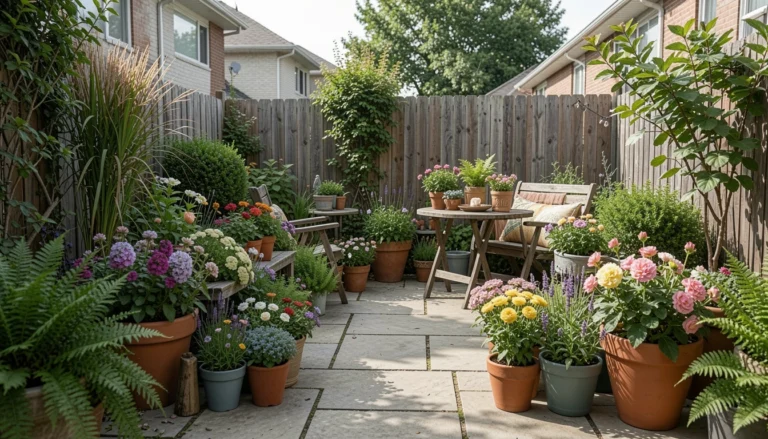
9 Luxury Garden Path Ideas
I finally learned what a path can do for a garden.
A route changes how you move. It frames small moments.
These ideas are simple to build and feel quietly luxury. I show what worked and what didn’t.
9 Luxury Garden Path Ideas
These 9 ideas show real, achievable ways to make a garden path feel luxurious without overdoing it. I include materials and honest tips.
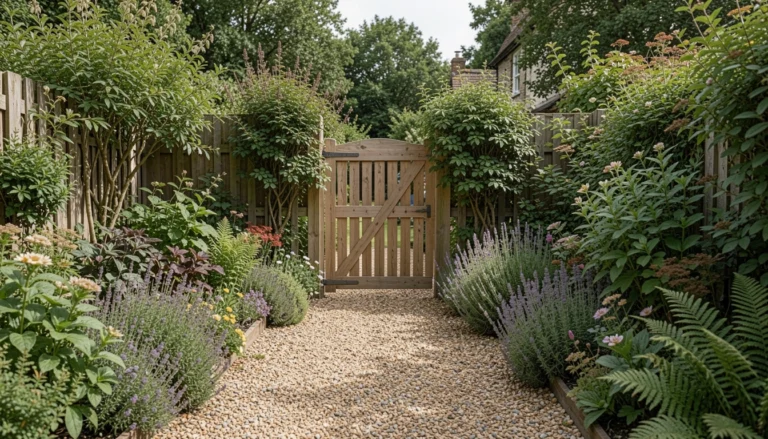
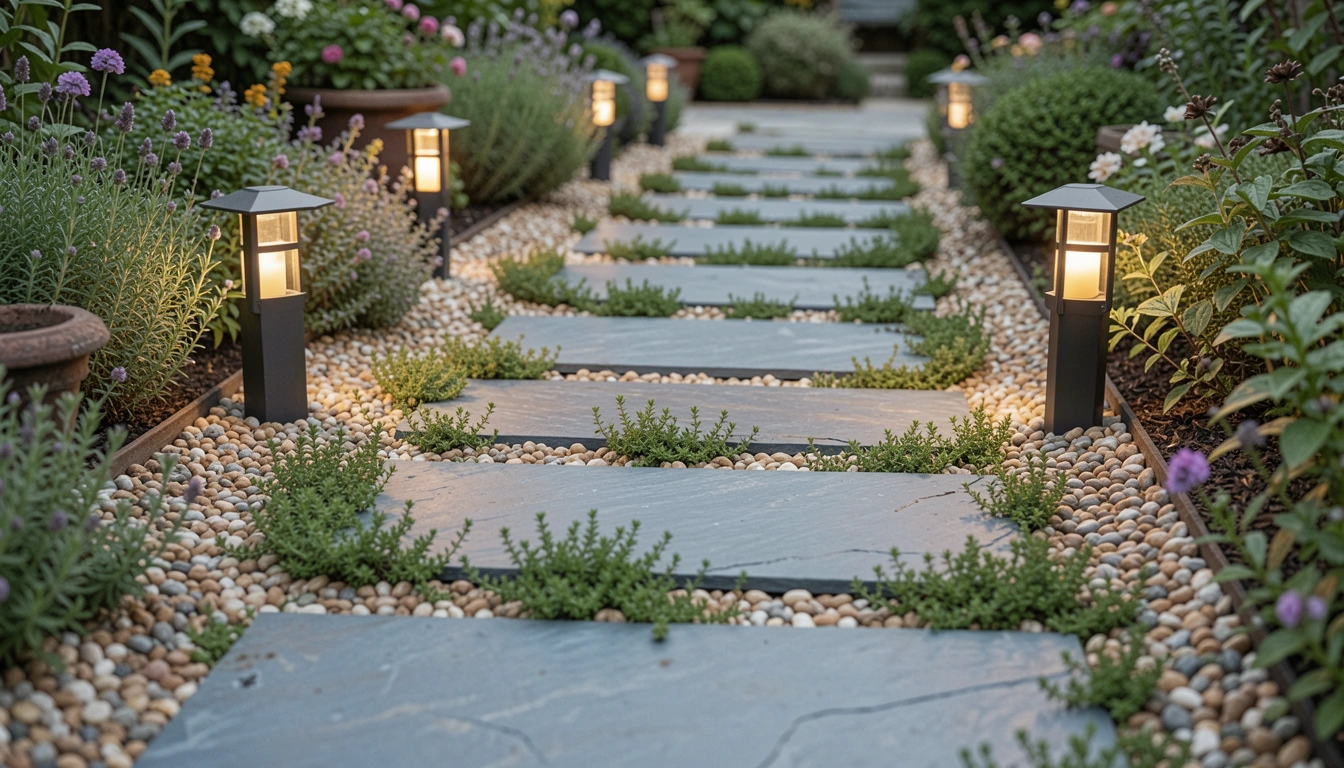
1. Irregular Bluestone Set in Pea Gravel
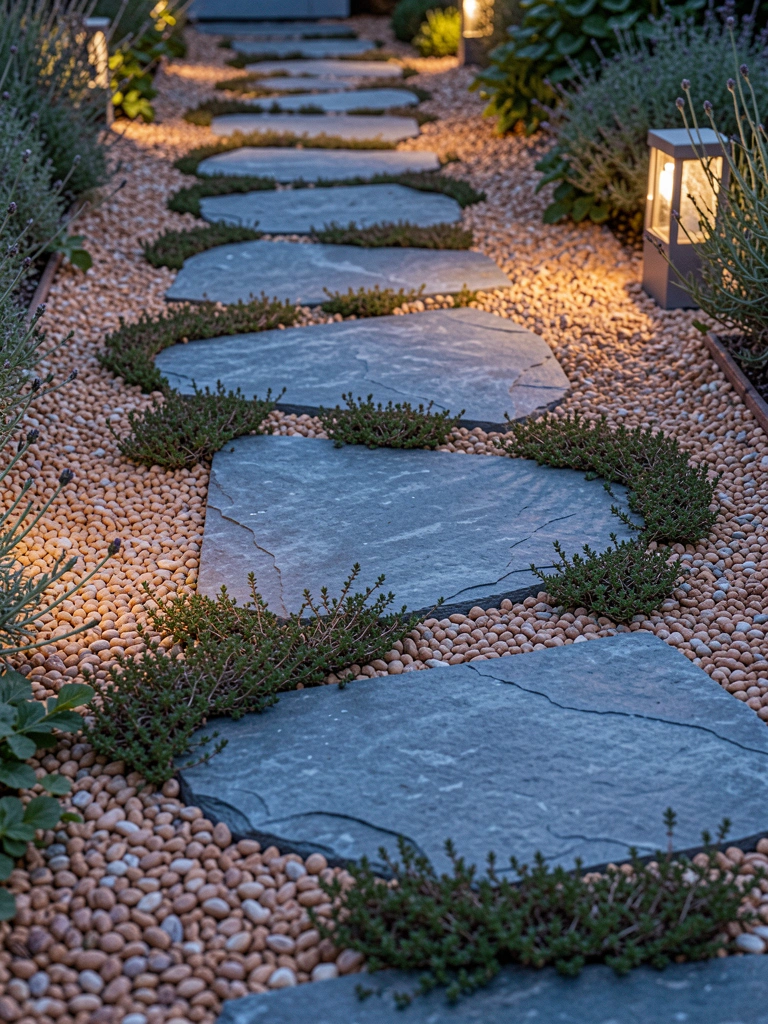
I paved a narrow side path with irregular bluestone set into pea gravel. It immediately felt intentional and calm.
I noticed the stones settled faster than I expected. I had to re-level a few in the first season.
Visually, warm gravel against cool stone made the planting look richer. Guests slow down to step across it.
Tip: pick stones with similar thickness and tamp the base well. Plant thyme or dwarf sedum in the joints for scent and softness. Truly.
What You’ll Need for This Look
- Irregular bluestone slabs (2–3 inch thickness)
- Pea gravel (3/8 inch)
- Thyme plugs or dwarf sedum
- Crushed limestone base (3/4 inch)
2. Narrow Slate Line with Clipped Boxwood
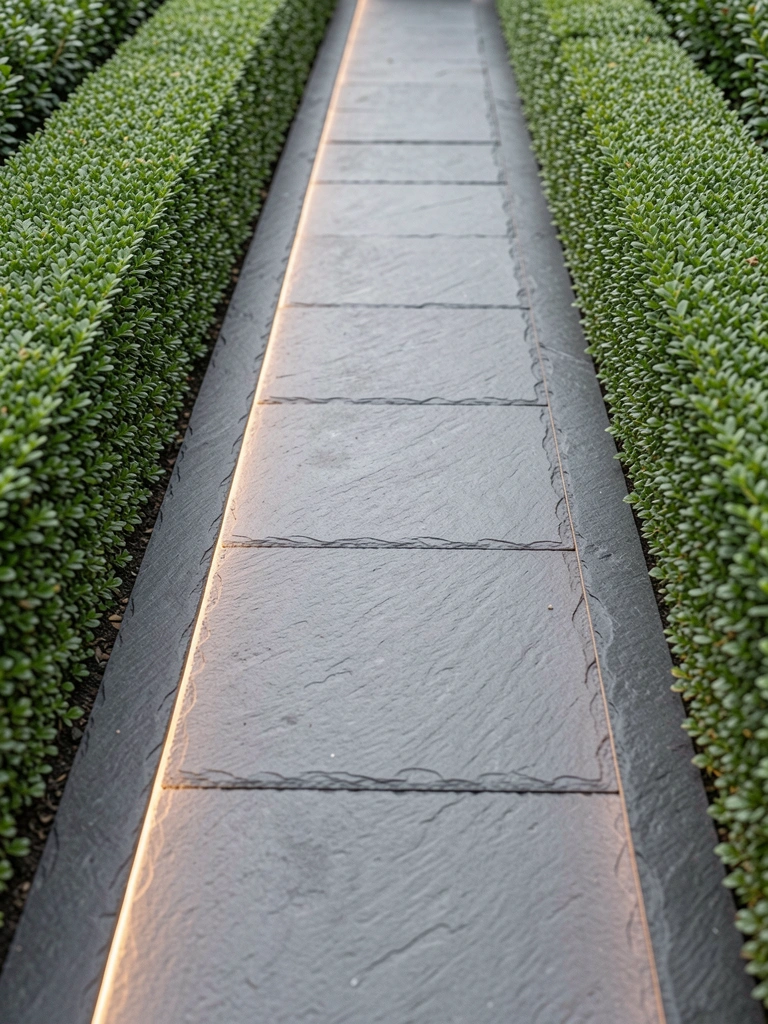
I edged my formal front path with narrow slate slabs and clipped boxwood. The line looked crisp and a little grand without fuss.
At first the boxwood browned on one sunny corner. I had overplanted and the roots crowded. I pruned and re-spaced them the next spring.
A low warm LED runs along the edge now. At dusk the path reads like a set piece and people linger at the gate.
Tip: buy 6–8 inch boxwood and plant on 18 inch centers. Use consistent-slab slate on a compacted sand bed for stability.
What You’ll Need for This Look
- Narrow slate slabs (consistent thickness)
- 6–8 inch boxwood (qty depends on path length)
- Warm white LED strip or spike lighting
- Compacted sand bed materials
3. Reclaimed Teak Boardwalk Over a Wet Corner
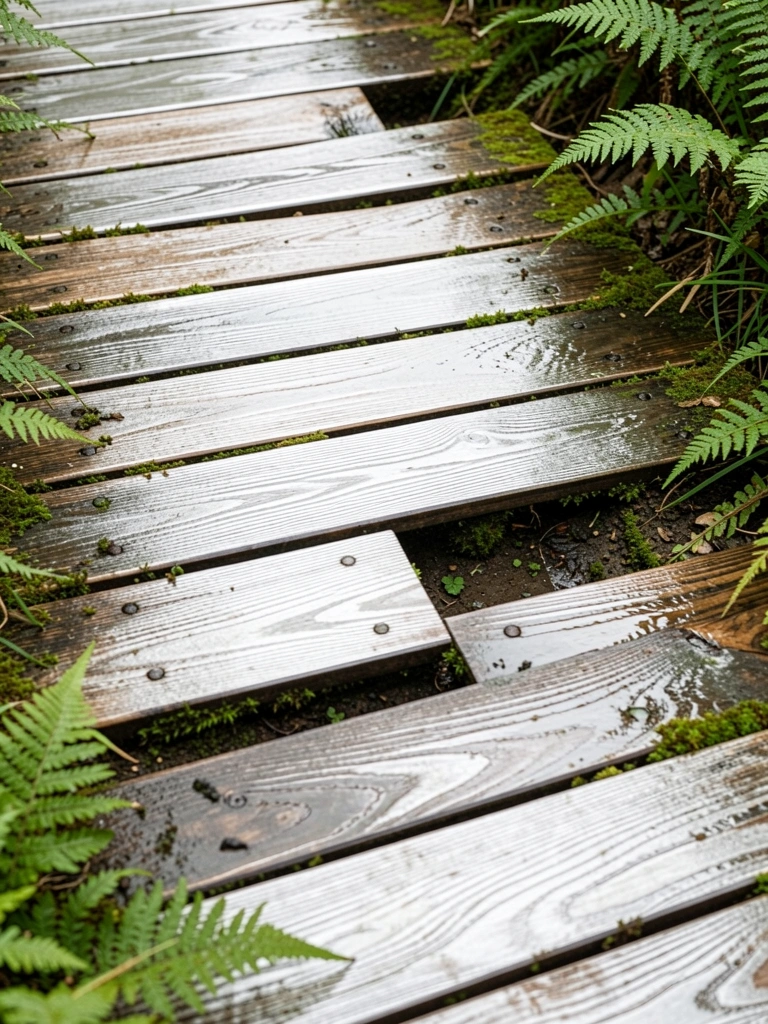
I built a short teak boardwalk across a wet corner and it made the space feel cared for. The boards aged to silver and looked like they've been there for years.
I bought cheaper teak once and it warped. I replaced two boards and now I stick to grade-A timber.
The contrast of rough barky beds against smooth planks slows you down. I often stand and listen to frogs on an evening.
Tip: pre-drill all screw holes and leave a 3/8 inch gap between planks. Oil once the first year then let it weather. I keep a spare board.
What You’ll Need for This Look
- Grade-A teak boards (1×6 or 1×8)
- Stainless steel deck screws (coated)
- 3/8 inch spacer rods
- Exterior wood oil (optional first year)
4. Herringbone Brick Route with Concrete Edge
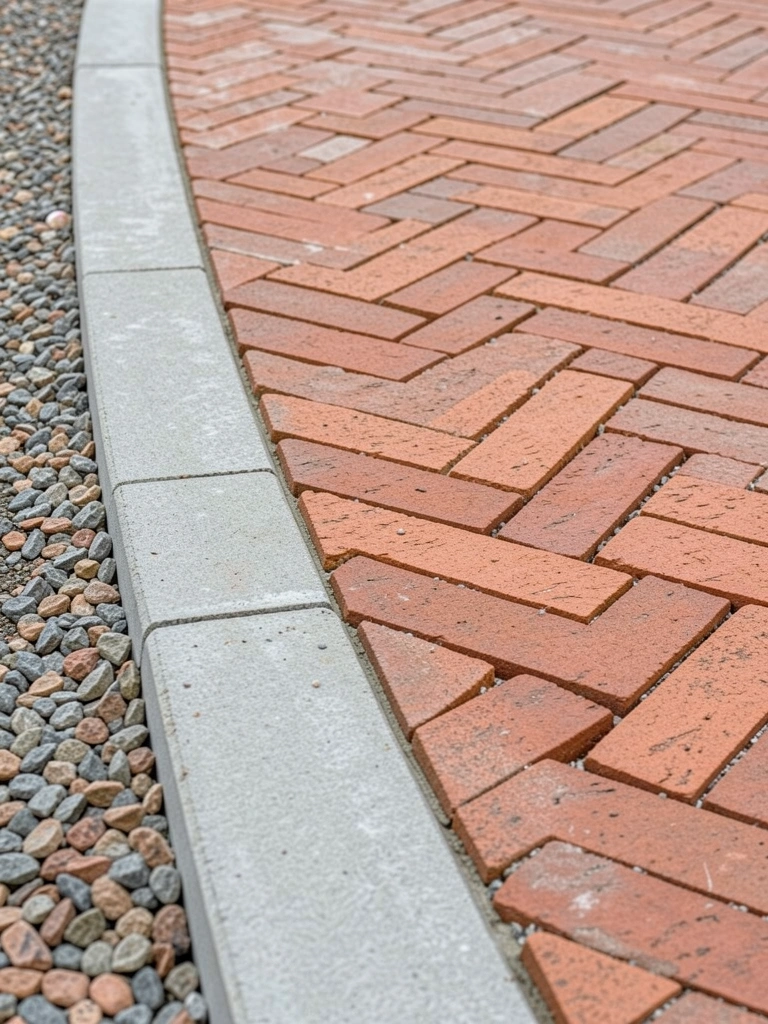
I laid a herringbone brick path to lead from patio to greenhouse. The pattern gives weight and looks intentionally finished.
I under-estimated how much sand sits between bricks. After a wet winter it washed away in places. I re-swept and applied polymeric sand to lock it in.
The warm red bricks warmed the planting palette. It reads comfort and craft rather than formality.
Tip: use 4×8 bricks on a compacted base and edge with poured concrete for a clean line. Seal the bricks if you want deeper color in wet months. I bought reclaimed bricks that vary in height; it gives character but needs levelling.
What You’ll Need for This Look
- 4×8 clay bricks (reclaimed or new)
- Polymeric sand or jointing compound
- Poured concrete edge form kit
- Brick sealer (optional)
5. Pebble Mosaic with Brass Inlay
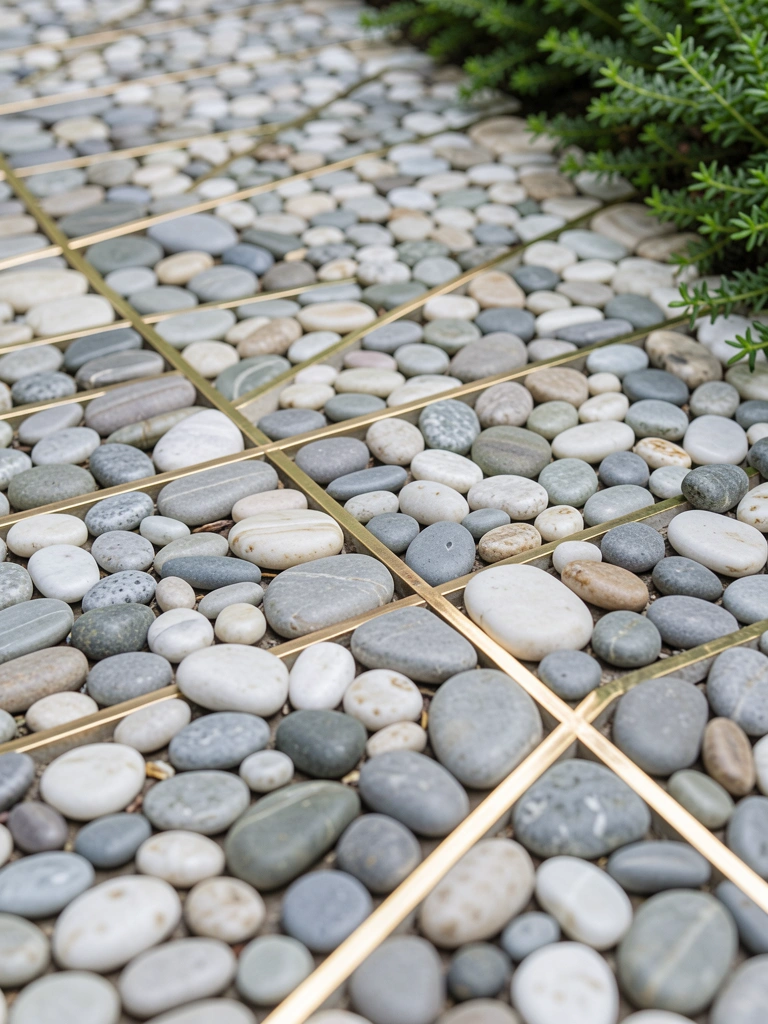
I designed a small pebble mosaic by the gate and inlaid thin brass strips for lines. It felt like a tiny jewel in the garden.
I didn't anticipate how quickly the brass would develop a greenish patina. I learned to polish and leave it if you prefer age.
The pebbles make a low sound underfoot. Neighbors commented on the detail more than I expected. It adds a careful, quiet luxury.
Tip: choose smooth river pebbles, epoxy them into a 2 inch mortar bed, and use 1/8 inch brass strips. Seal with outdoor grout sealer. Use 3/8 inch screws to pin the brass at edges and keep hinges for expansion.
What You’ll Need for This Look
- Smooth river pebbles (varied sizes)
- 2 inch mortar mix
- 1/8 inch brass strips
- Outdoor grout sealer
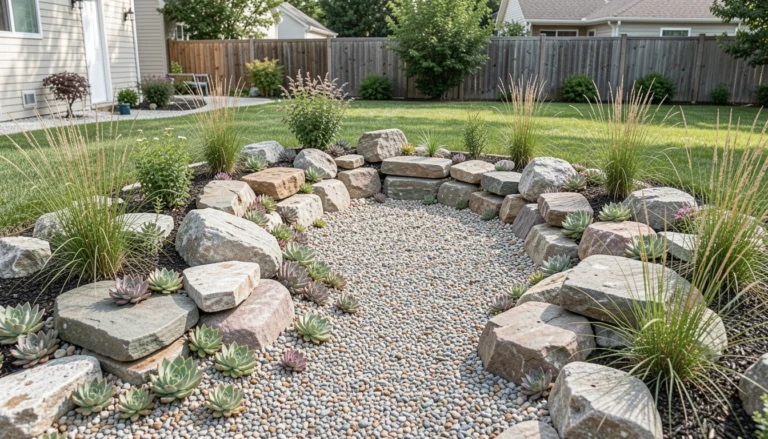
6. Dry River Rock Bed with Stepping Slabs
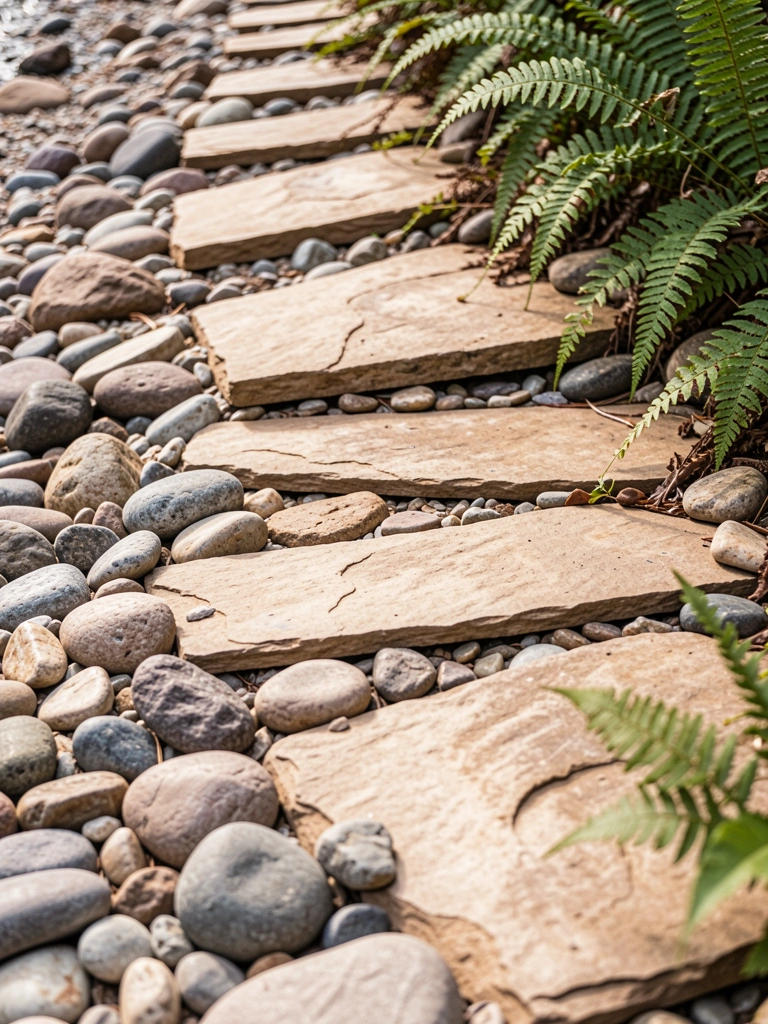
I dug a shallow dry river bed to move water away and to add texture. I placed flat sandstone stepping slabs across it so the movement feels intentional.
I was surprised how much louder the garden sounds when the stones sit on sand. Birds take the new puddles in spring.
The dry bed made the rest of the garden feel calmer. It created a ribbon through the planting that my wife and I both enjoy.
Tip: use river rock in three sizes, 4–8 inch flat stepping slabs, landscape fabric under rock, and a small sub-drain where water pools. Native ferns filled edges in two seasons easily with little care.
What You’ll Need for This Look
- River rock (three size ranges)
- 4–8 inch flat stepping slabs (sandstone)
- Landscape fabric and sub-drain kit
- Native fern plugs
7. Large Granite Slabs with Low Groundcover Joints
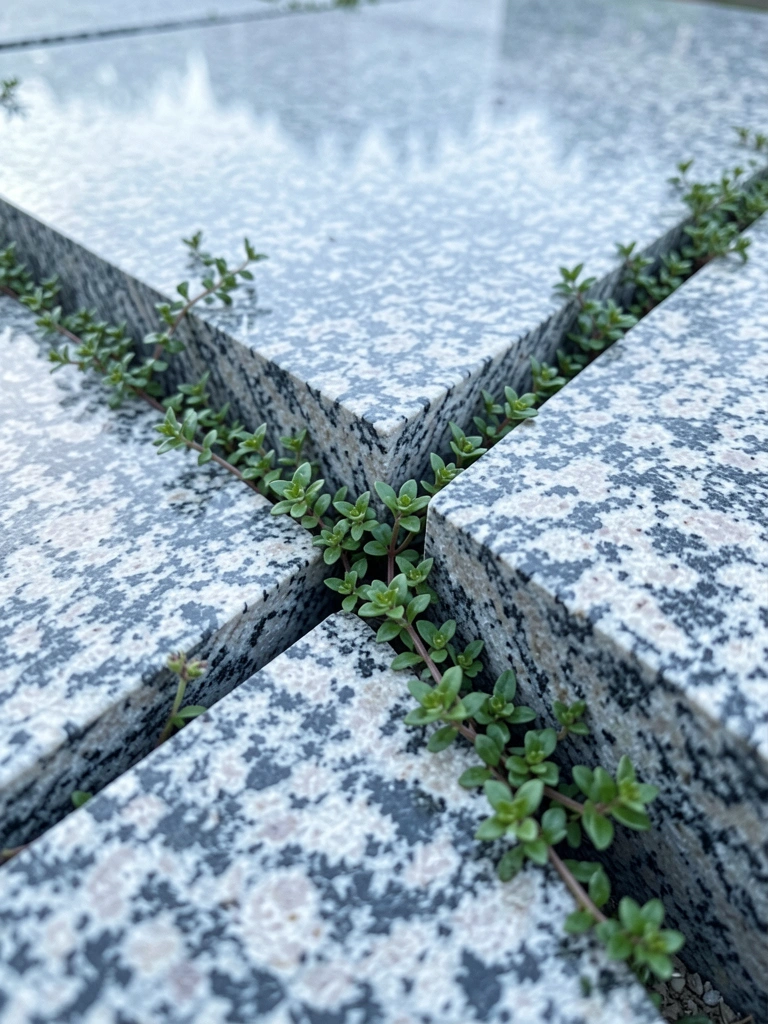
I installed large polished granite slabs across my lawn to make a modern, clean route. The surface looks high-end and it stays cool underfoot.
I didn't expect the polish to become slippery in winter. I replaced the worst slab with a honed finish and added anti-slip beads.
The low groundcover between slabs—creeping thyme and dwarf juniper—softened the lines. I walk slower now and notice the planting more.
Tip: pick slabs 24 by 36 inches, choose honed finishes for cold climates, and use high-quality jointing mix plus low groundcover plugs. I sourced slabs locally and set them on compacted crushed stone for long life and easy repairs too.
What You’ll Need for This Look
- Granite slabs (24×36 inches)
- Honed finish option (for slip resistance)
- Creeping thyme or dwarf juniper plugs
- Compacted crushed stone base
8. Lantern-Lined Gravel with Pleached Trees
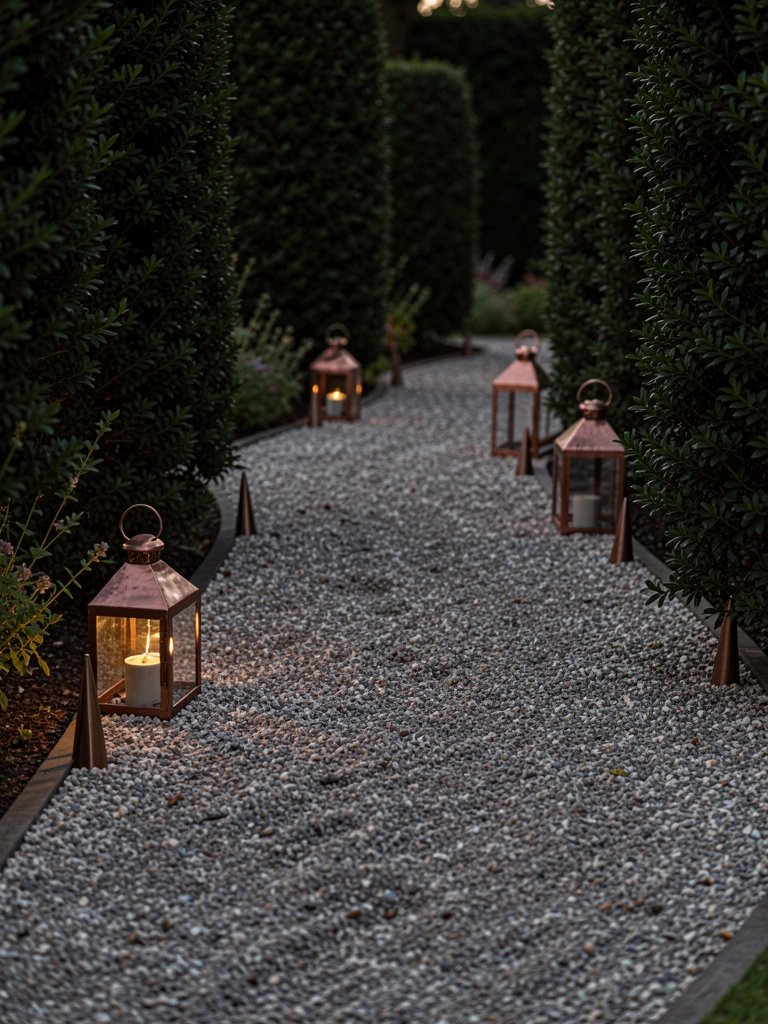
I lined a winding gravel path with low lanterns and pleached hornbeam. The rhythm of light and trunks makes the walk cinematic in a lived-in way.
I once used cheap lanterns that collected water. I swapped to sealed copper lights and saw less failure.
The gravel crunch and amber pools of light make evening strolls slow. The planting under the pleached trees is shade-loving geranium and hosta, which filled in after two seasons.
Tip: choose 3–4 inch crushed gravel, install 12 inch spikes for lanterns, buy sealed copper or brass fixtures, and plant pleached trees on 6–8 foot centers. I keep a spare bulb in the shed; it's handy and cheap.
What You’ll Need for This Look
- 3–4 inch crushed gravel (path surface)
- Sealed copper/brass lanterns with 12 inch spikes
- Pleached hornbeam or similar trees
- Shade-loving perennials (geranium, hosta)
9. Curved Bluestone Route with Recessed Lighting
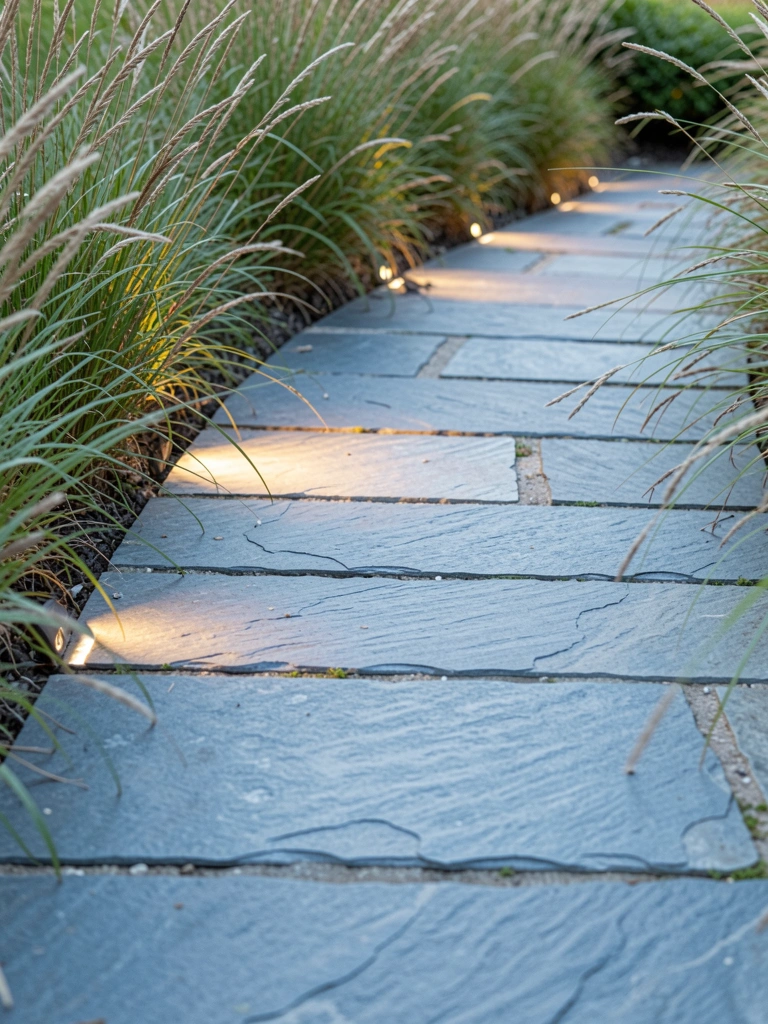
I carved a gentle curve of bluestone through mixed borders. The curve invites wandering and hides the compost bin from first view.
I misjudged the radius at first and had to move three stones. It cost time but softened the route.
At night recessed strip lights in the joints give a thin glow. The mix of grasses and box adds movement and structure in day and night.
Tip: buy irregular bluestone slabs, request varying widths, order low-profile LED in-ground fixtures, and plant a mix of ornamental grass, lavender, and dwarf box. I used a skid-steer to place the largest pieces. Work slowly; small changes make a visual difference.
What You’ll Need for This Look
- Irregular bluestone slabs (varying widths)
- Low-profile in-ground LED fixtures
- Ornamental grasses, lavender, dwarf box (plugs)
- Skid-steer or hand tools for placement
Final Thoughts
You don’t need to use every idea. Pick one that fits the space and your time.
Start small. Fix mistakes as you go.
I’ve made wrong choices and learned what lasts. You’ll find a path that feels like home and grows better every year.