12 Rustic DIY Garden Path Ideas
I learned most about paths by fixing the ones I ruined.
They became my favorite small projects — quick, visible changes that actually get used.
I’ll show practical, low-cost ways I rebuilt old routes.
These are honest, hands-on diy garden path ideas that I’ve lived with.
12 Rustic DIY Garden Path Ideas
I picked 12 simple, rustic paths I’ve built or fixed.
Each one I’ve lived with, not staged.
Expect real mistakes, small wins, and clear lists of what I used.
1. Reclaimed Brick Ribbon Path
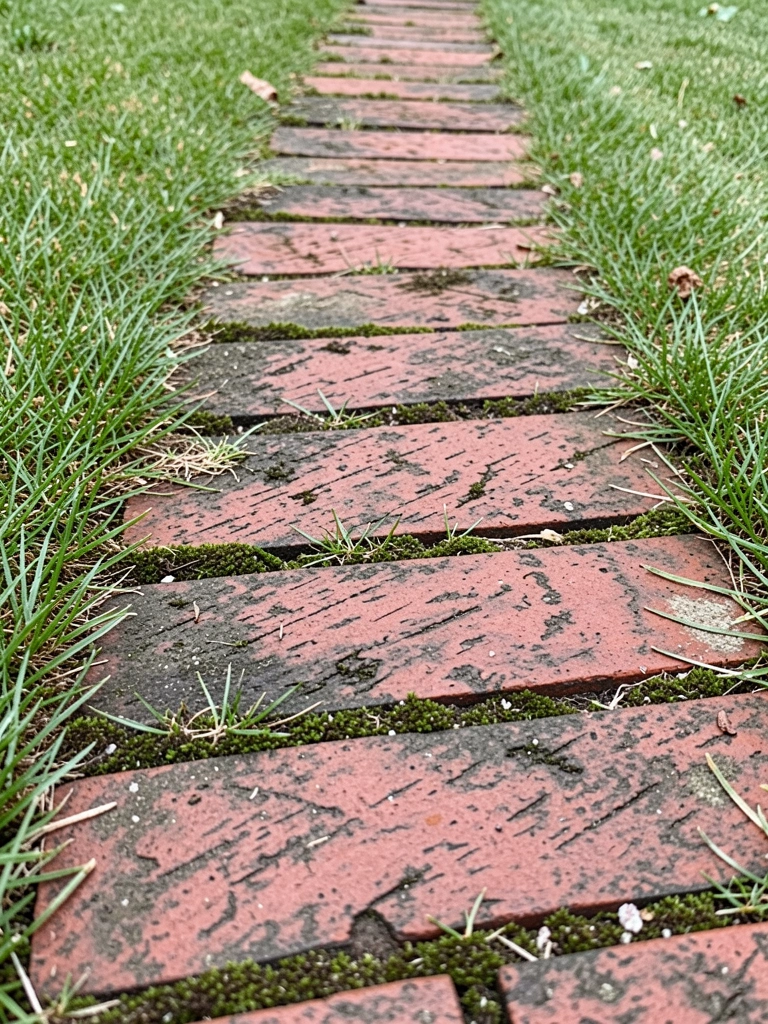
I ripped out an ugly concrete strip and replaced it with two rows of reclaimed brick.
I liked the way it reads as a clear ribbon through the grass.
At first I laid bricks flat and they sunk—my mistake. I fixed that by adding compacted sand and a thin gravel base.
The path feels warmer than concrete and mends easily if a brick heaves.
It’s low fuss and very forgiving.
What You’ll Need for This Look
- Reclaimed red bricks (standard size)
- Sharp sand (for leveling)
- Compacted gravel base (3/4 inch)
- Rubber mallet and hand tamper
2. Stepping Stones in Creeping Thyme
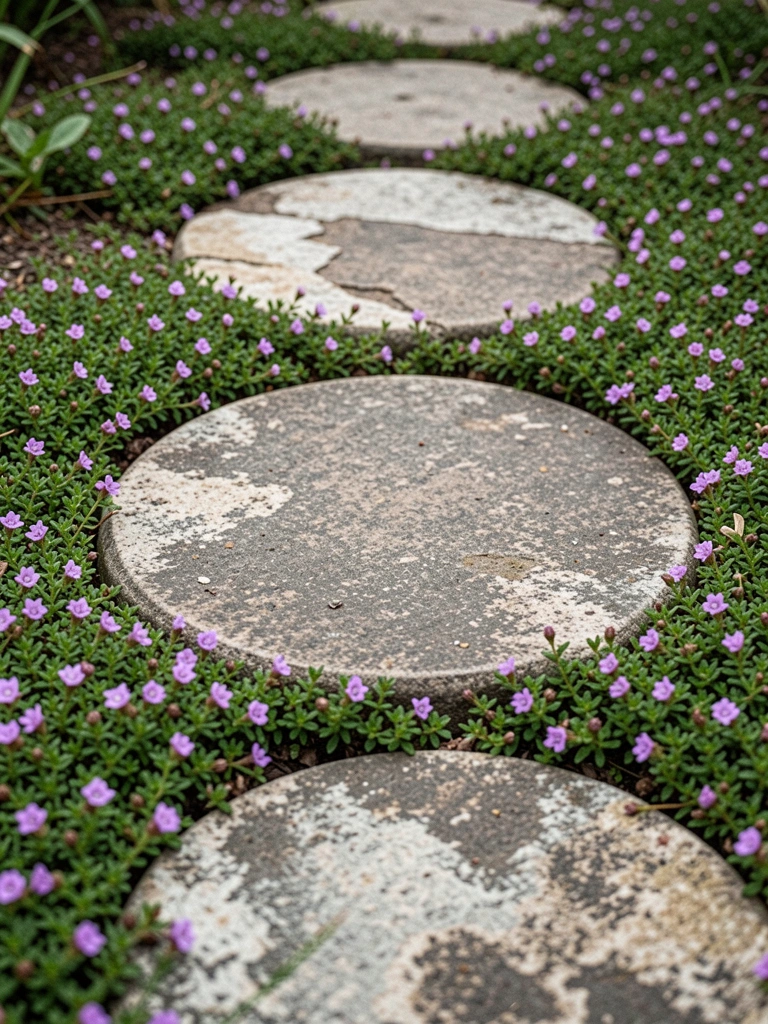
I laid large stepping stones with creeping thyme filling the gaps.
The thyme softens footsteps and smells when I walk.
I chose irregular stones to look less formal, and I let edges be slightly uneven on purpose.
It’s a forgiving layout: I moved stones once I saw how people actually walked.
Maintenance is mostly trimming and weeding in year two.
What You’ll Need for This Look
- 16–18 inch natural stepping stones
- Creeping thyme plugs (groundcover)
- Coarse sand for bedding
- Garden spade and kneeling pad
3. Recycled Wine Bottle Border Path
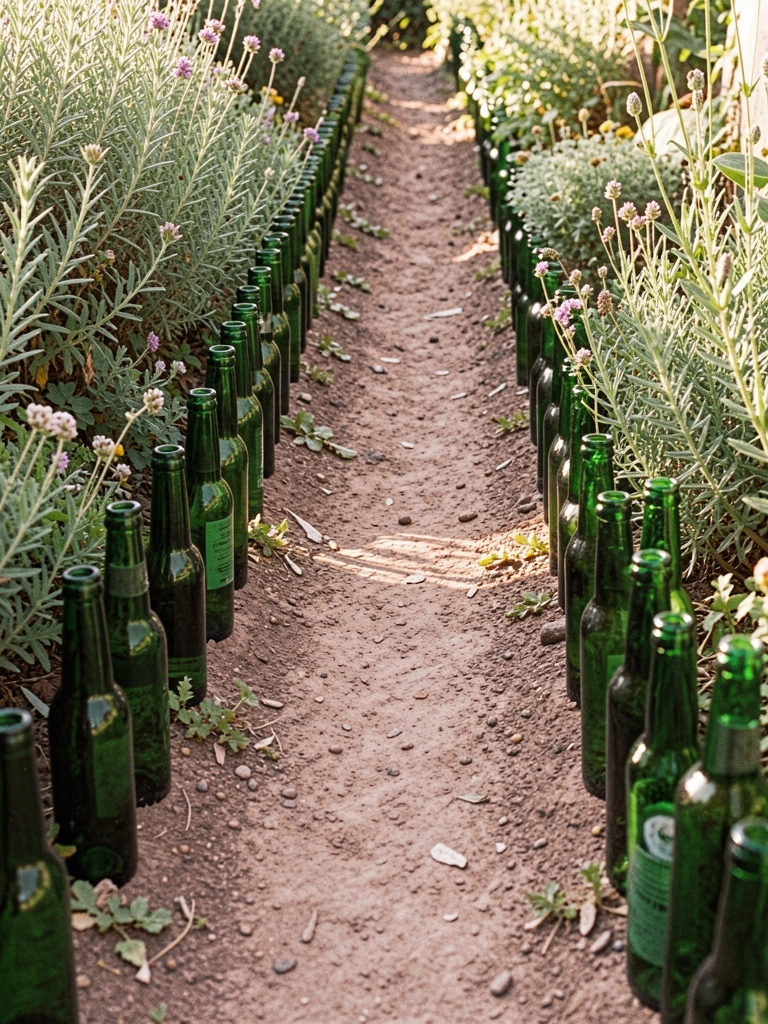
I built a small path edged with old wine bottles I collected over a season.
The glass catches light and keeps mulch in place.
I learned bottles are best buried neck-up so they don’t sink; I also replaced a few after winter frost shifted them.
It’s cheap and charming, and easy to expand later.
The bottles make the path feel personal and a little rustic.
What You’ll Need for This Look
- Assorted wine bottles (green and brown)
- Sand and gravel for setting
- Mulch or pea gravel for the path surface
- Work gloves and post-hole digger
4. Log Slice Stepping Path through Shade
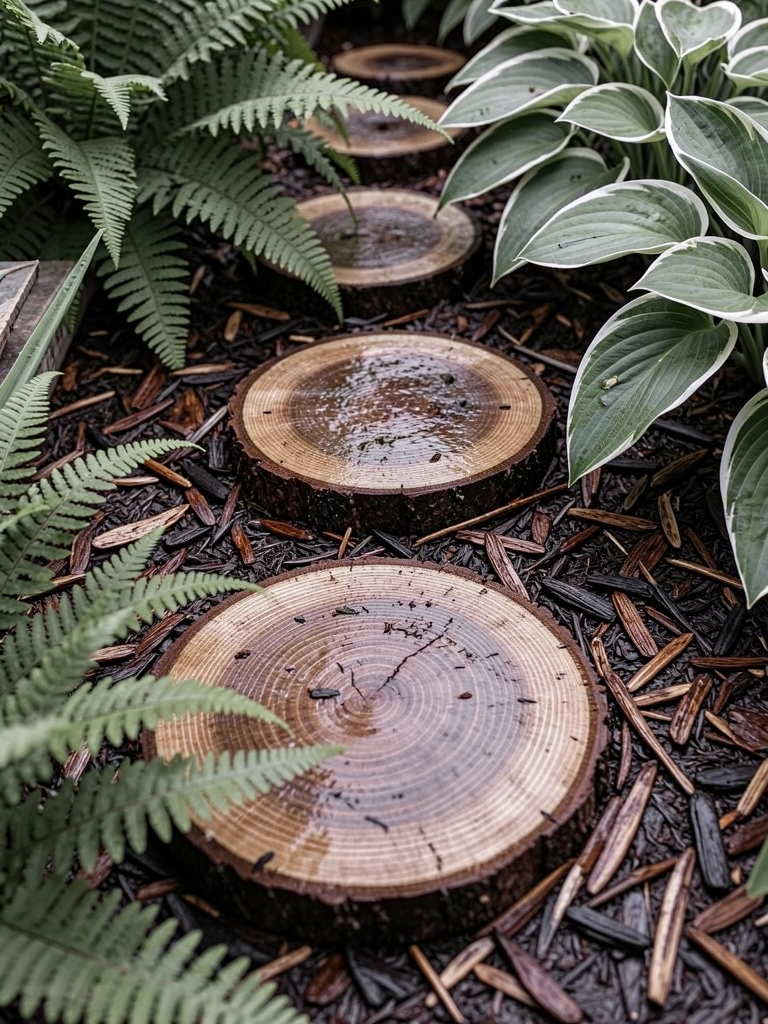
I made a woodland trail with log slices from a local sawmill.
They feel great underfoot and look very natural with ferns.
I messed up once by using slices that weren’t sealed; they started to rot faster than I expected. After that I treated each slice with penetrating wood preservative.
If you space them to match stride, the path flows.
They need occasional resealing and level checks.
What You’ll Need for This Look
- Log slices (10–14 inch, 2–3 inch thick)
- Wood preservative or outdoor oil
- Bedding sand or crushed stone
- Rubber mallet and level
5. Flagstone with Moss Joints
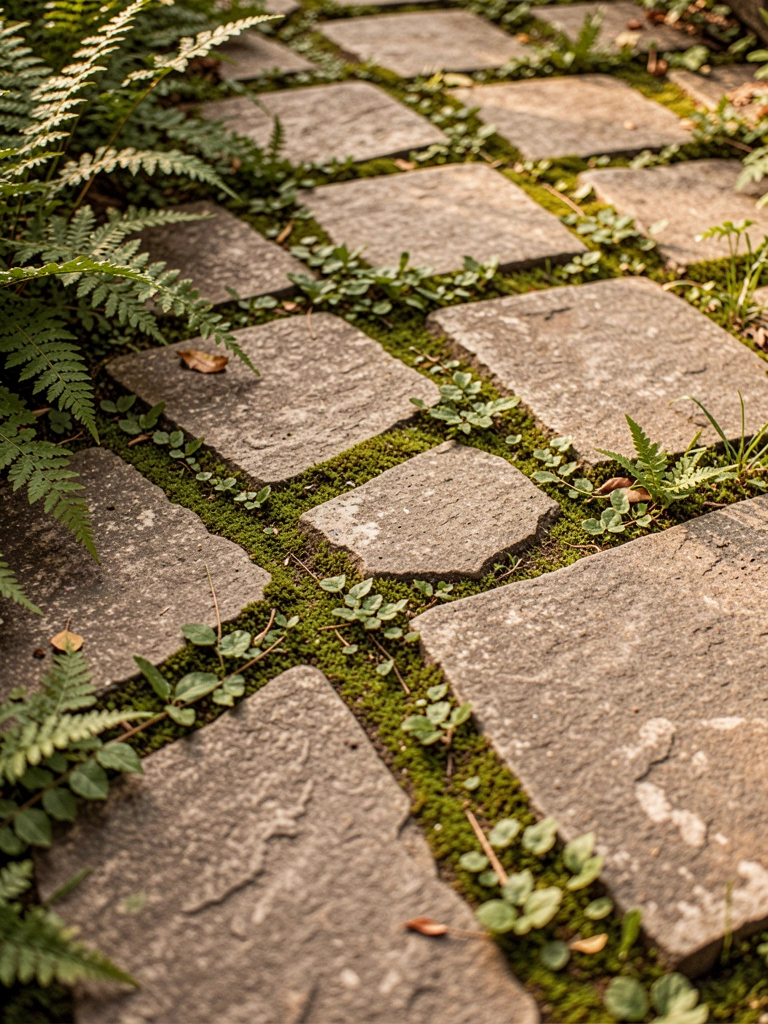
I ripped up a tight, formal path and replaced it with irregular flagstone and moss in the seams.
The moss softens the hard edges and invites bare feet in summer.
At first I tried to grout the gaps and it looked wrong—moss was the better choice for my shady garden.
The stones settle over time and feel anchored.
I love the soft look and the smell after rain.
What You’ll Need for This Look
- Irregular flagstone pieces (varied sizes)
- Sheet moss or moss plugs
- Decomposed granite or coarse sand for bedding
- Rubber mallet and broom
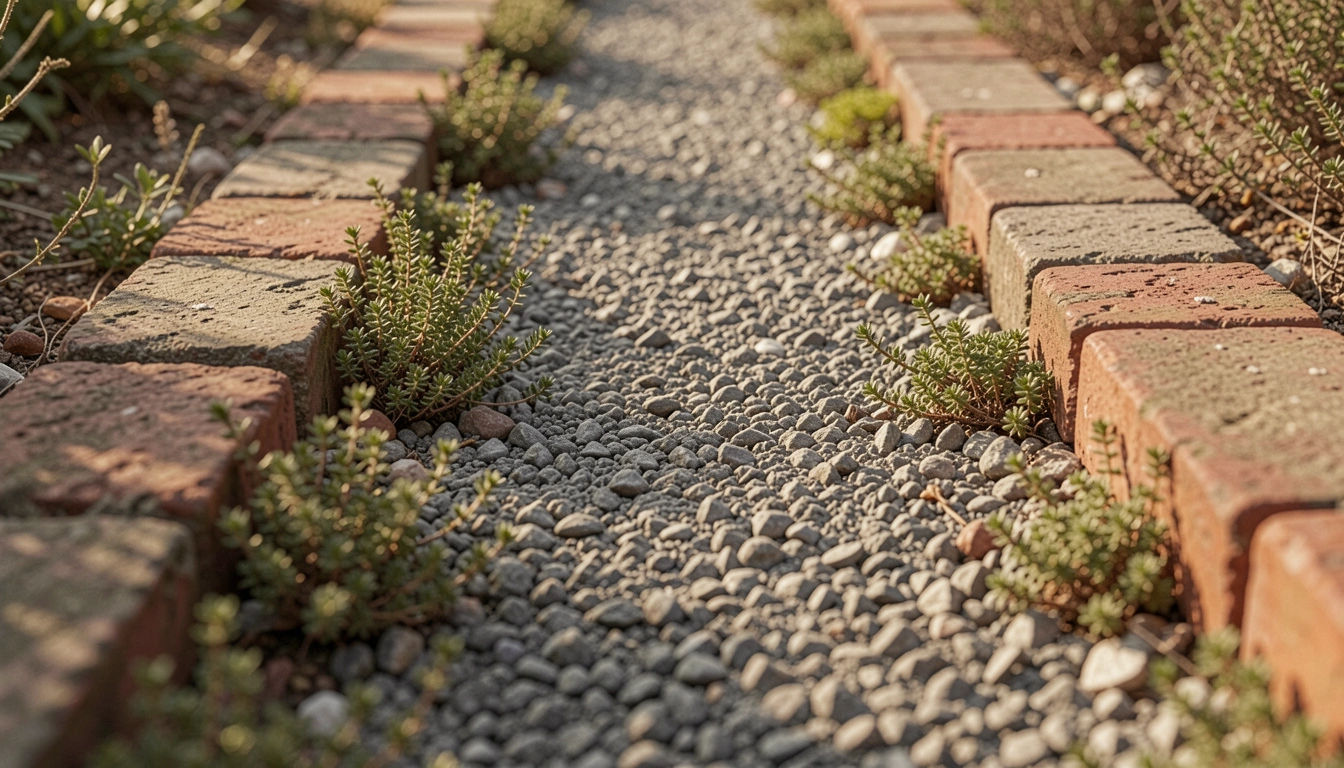
6. Crushed Gravel with Steel Edging
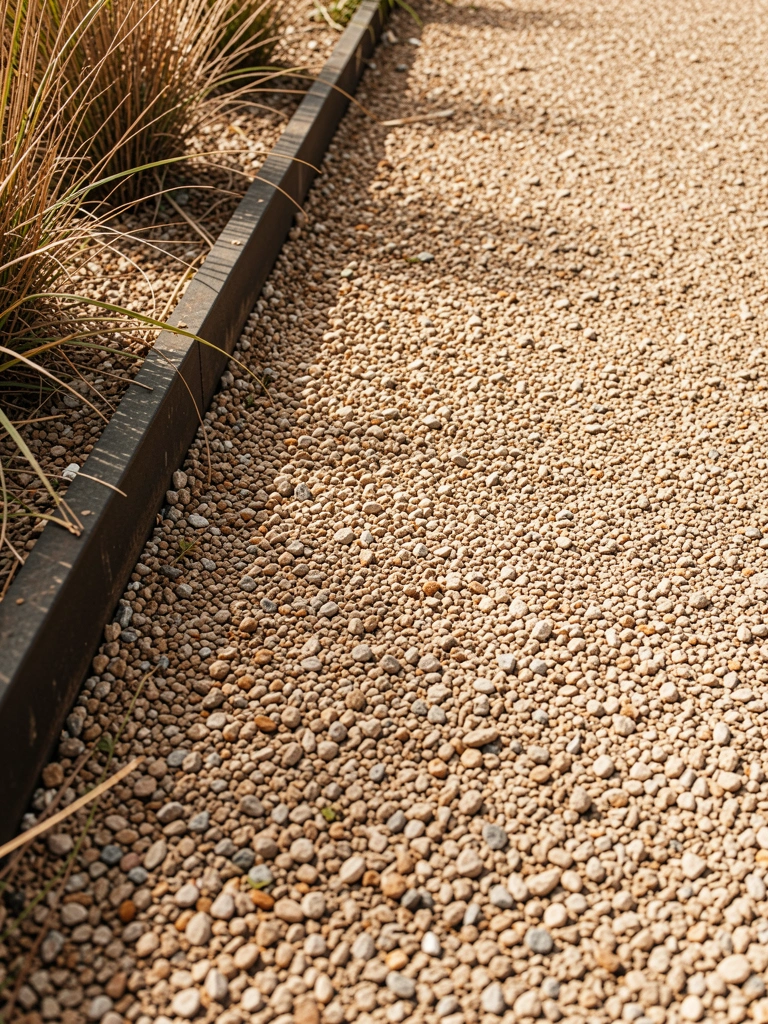
I installed a crushed gravel path with corten steel edging to keep lines clean.
The gravel compacts underfoot and sheds water well.
My early mistake was skipping edge spikes—stones spread until I anchored the steel properly.
Now it holds shape and looks tidy without being fussy.
It’s simple, durable, and easy to rake back into place.
What You’ll Need for This Look
- 3/8 inch crushed gravel (compactable)
- Corten steel edging strips
- Steel spikes and rubber mallet
- Plate compactor (rental)
7. Reclaimed Lumber Boardwalk
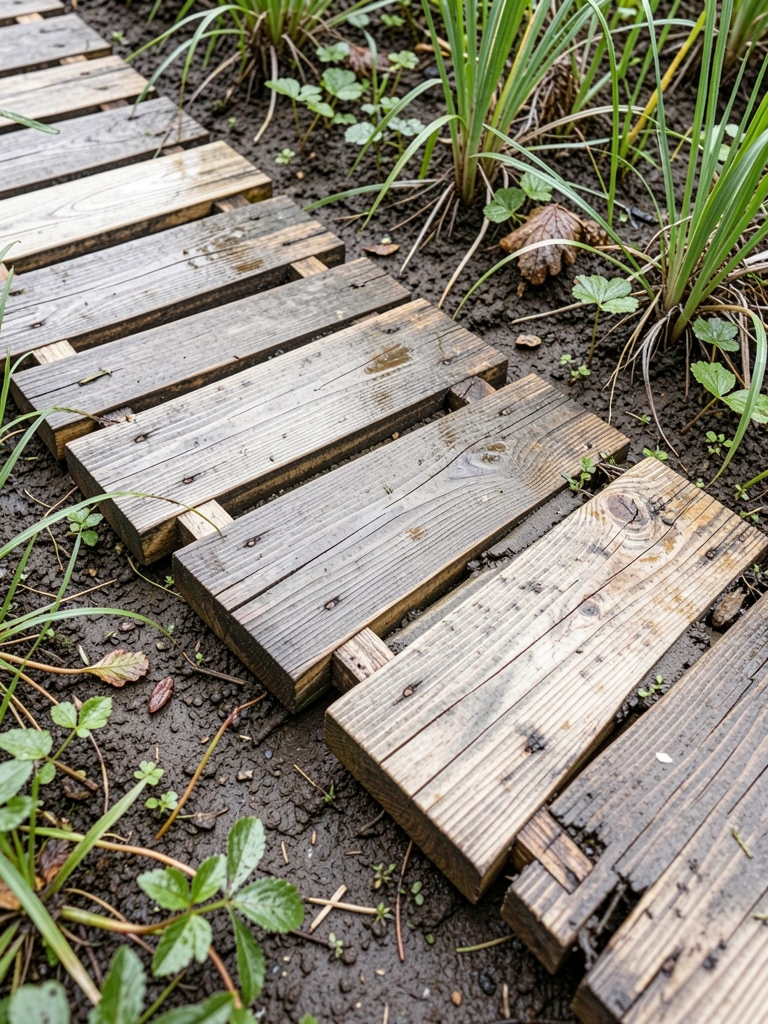
I built a short boardwalk from old barn boards across a soggy patch.
It stopped muddy shoes and gave a clear route.
I learned the hard way that untreated boards warp; I ended up adding cross-braces and sealing the tops.
It looks lived-in and fits a rustic plot.
Expect some seasonal shifting and plan for replacement boards in a few years.
What You’ll Need for This Look
- Reclaimed barn boards (1×6 or 1×8)
- Stainless steel screws
- Wood sealer or stain
- Circular saw and drill
8. Concrete Pavers with Wildflower Joints
I poured square pavers and planted low wildflowers between them.
The slabs give a firm surface and the flowers soften the geometry.
At first I used a tight sand mix and nothing grew; loosening the joints and adding soil helped seed establishment.
This mix feels tidy but relaxed.
It’s good where I want both order and a bit of meadow.
What You’ll Need for This Look
- 18–24 inch concrete pavers
- Joint soil mix (garden soil + sand)
- Wildflower seed mix or low perennials (e.g., thyme, dwarf dianthus)
- Rubber mallet and level
9. Pebble Mosaic Accent Path
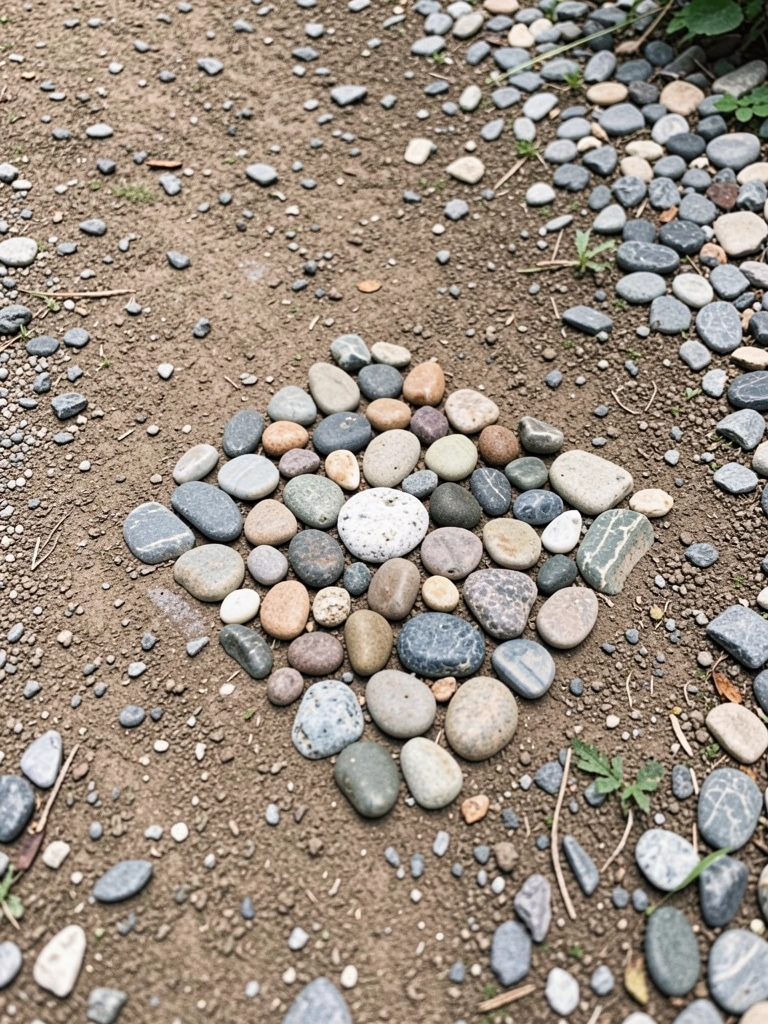
I made a small mosaic inset as a focal stepping area using river pebbles.
It’s surprisingly easy if you make a shallow form and set pebbles in mortar.
I underestimated prep time—sorting pebbles by size saves hours.
People always notice this little detail.
It’s a great short project that breaks up a long run of gravel.
What You’ll Need for This Look
- River pebbles (varied sizes)
- Sand-cement mortar mix
- Wooden form or border
- Trowel and sponge
10. Cobble and Gravel Farm Lane
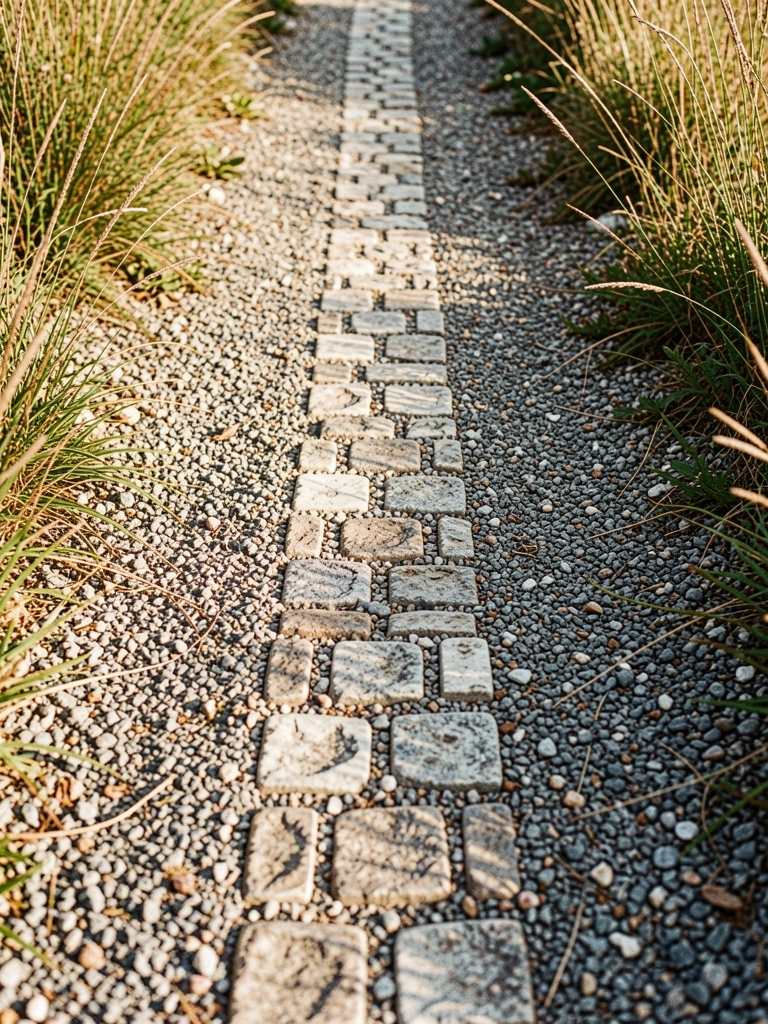
I laid a central cobble strip down a long lane and filled the sides with pea gravel.
The cobbles give a worn, farm feel and the gravel is easy to top up.
I made a mistake using too-large cobbles at first; they felt awkward under wheels. I swapped them for smaller stones and it rides better.
This combo handles traffic and still looks rustic.
It’s low maintenance if I add fresh gravel occasionally.
What You’ll Need for This Look
- Small cobble stones (2–3 inch)
- Pea gravel for surface
- Compacted sub-base (gravel)
- Plate compactor and wheelbarrow
11. Slate Tiles with Herb Edges
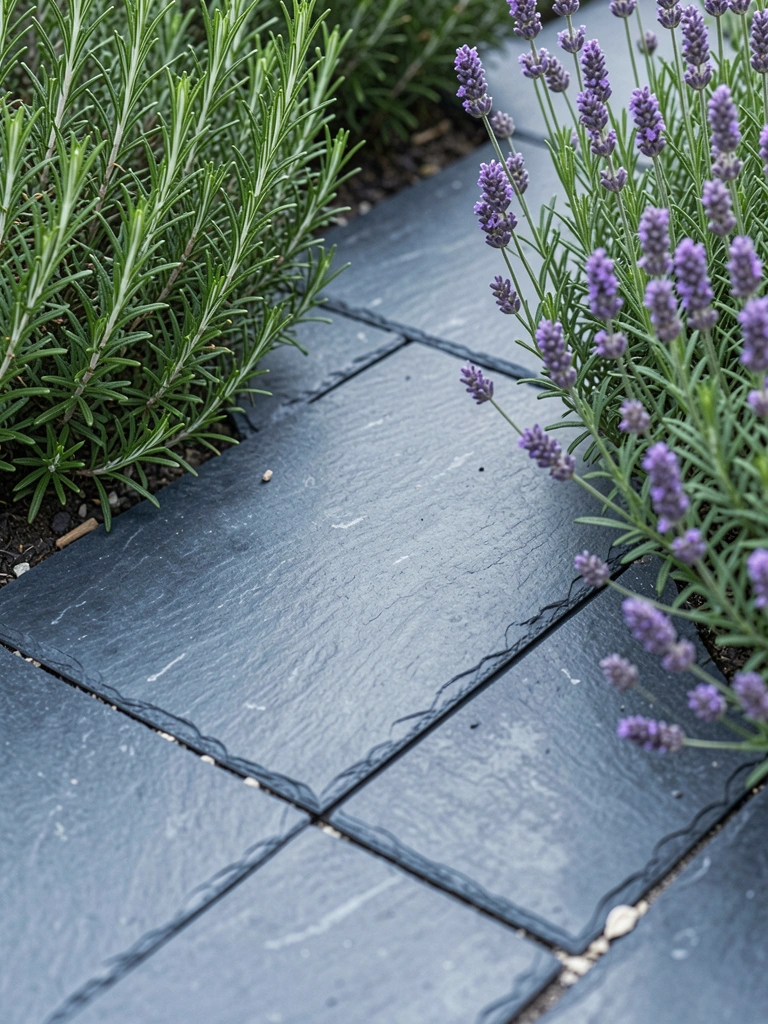
I placed slate tiles with low herbs framing both sides.
The slate stays cool and the herbs release scent when brushed.
I learned to bed the slate on a thin layer of sand and move tiles to match natural stepping patterns.
This path is quiet and smells good after sun.
It’s one of my favorite ways to marry hardscape and planting.
What You’ll Need for This Look
- Thin slate tiles (12–18 inch)
- Sand for bedding
- Rosemary and dwarf lavender plants
- Hand tamper and pruning shears
12. Broken Terracotta Tile Stepping Strip
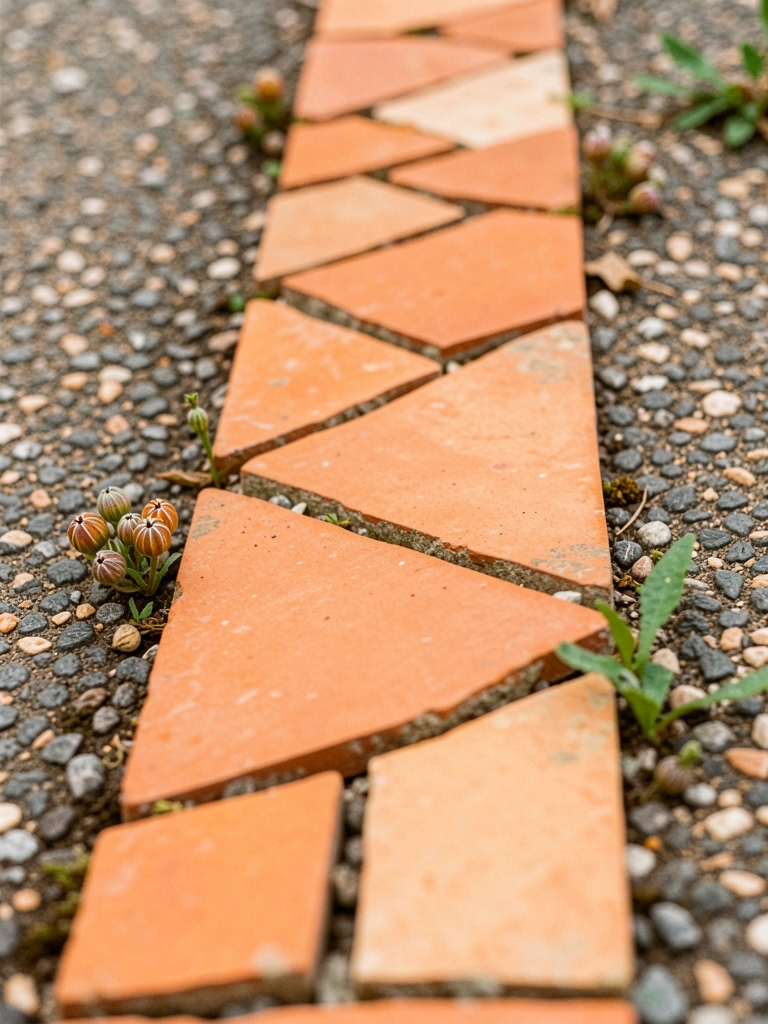
I used broken terracotta to make a warm, orange strip through pale gravel.
The color warms the whole bed and it was a cheap fix using old pots.
I did once place shards too close and tripped—later I ground a few edges smooth and spaced pieces for safe stepping.
It’s rustic, bright, and easy to expand as I find more pots.
It feels handcrafted without needing precise cuts.
What You’ll Need for This Look
- Broken terracotta shards (varied sizes)
- Pea gravel or crushed stone base
- Masonry adhesive (for loose pieces)
- Gloves and safety glasses
Final Thoughts
Paths change how a garden is used more than anything else.
I don’t do every idea at once. I pick one, live with it, then adjust.
Trust small experiments. They fix a lot and teach even more.