11 Budget-Friendly Garden Paths
I used to avoid paths because they felt expensive or fussy. Then I started patching what I had.
Paths changed how I walk the garden. They made small beds feel intentional.
Here are practical, cheap ideas I’ve actually built, fixed, and lived with.
11 Budget-Friendly Garden Paths
These 11 ideas are hands-on and low-cost.
They’re paths I’ve walked, repaired, and enjoyed.
Expect clear materials and one honest tip per idea.
1. Pea Gravel Ribbon with Brick Edging
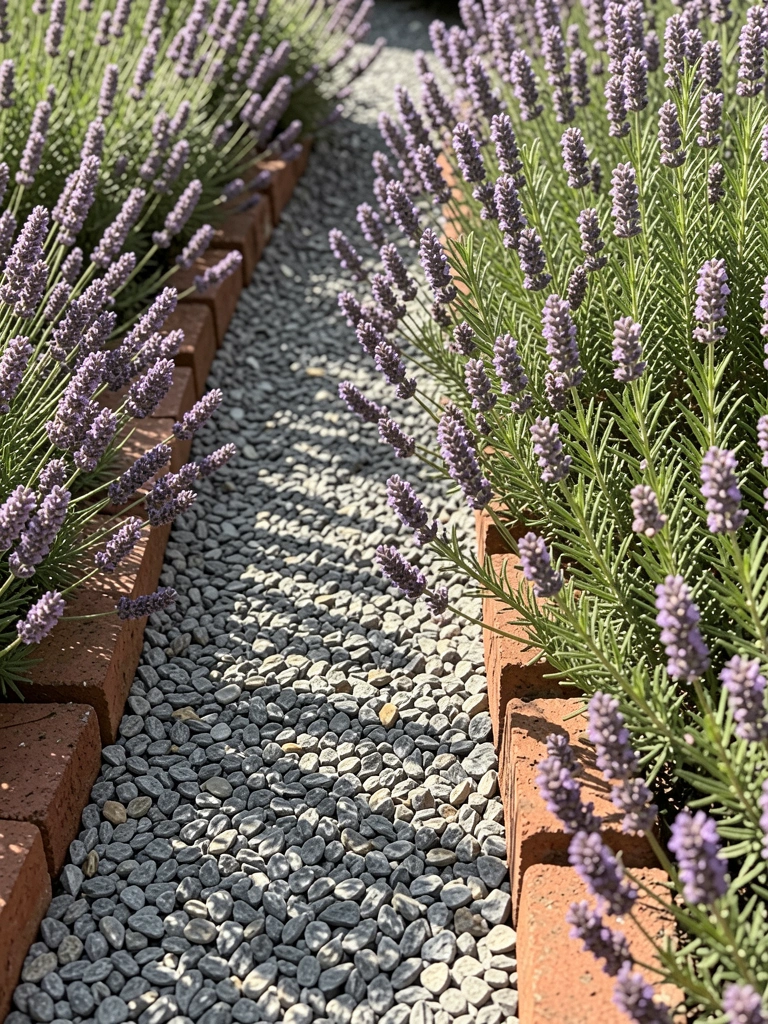
I laid a narrow pea gravel ribbon down the side of my house. It brightened a shady strip and stopped mud from tracking inside. I trimmed the gravel with old bricks I found at a yard sale, which gave a tidy edge without heavy tools. At first the gravel shifted into the lawn; I learned to tamp and add landscape fabric under the center. Now the path drains well and smells faintly of crushed thyme in summer.
What You’ll Need for This Look
- Pea gravel (3/8 inch), 50 lb bags
- Salvaged red bricks or brick edgers
- Landscaping fabric, 3 ft wide
- Hand tamper
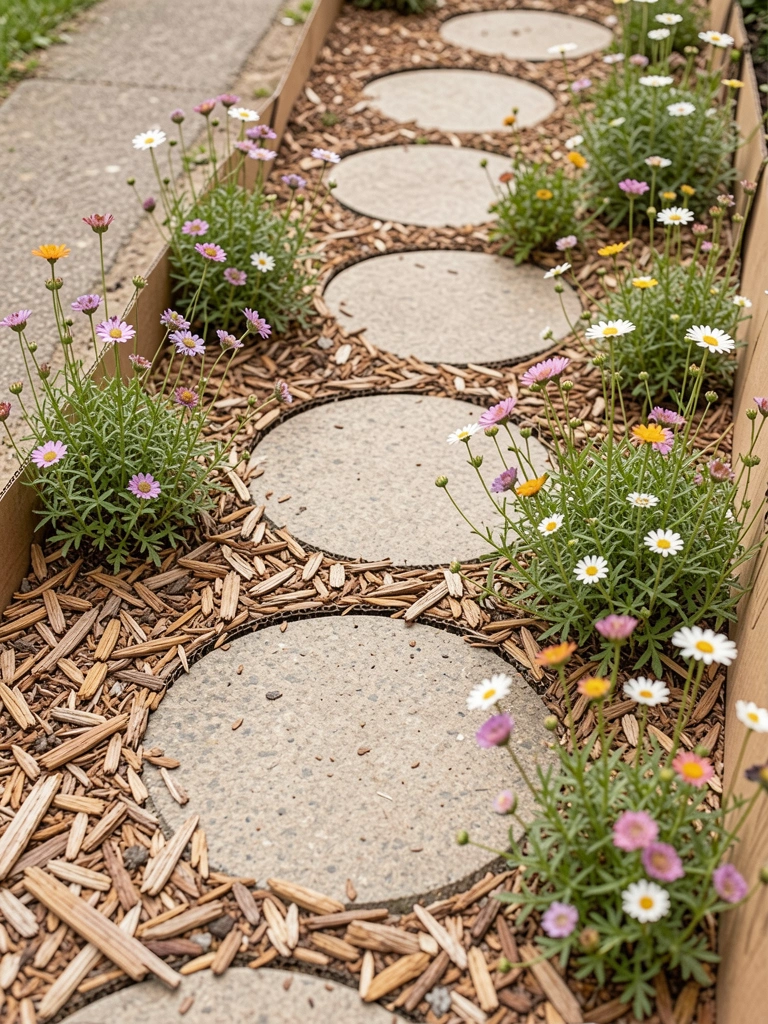
2. Stepping Stones on Groundcover (I planted too-large stones at first)
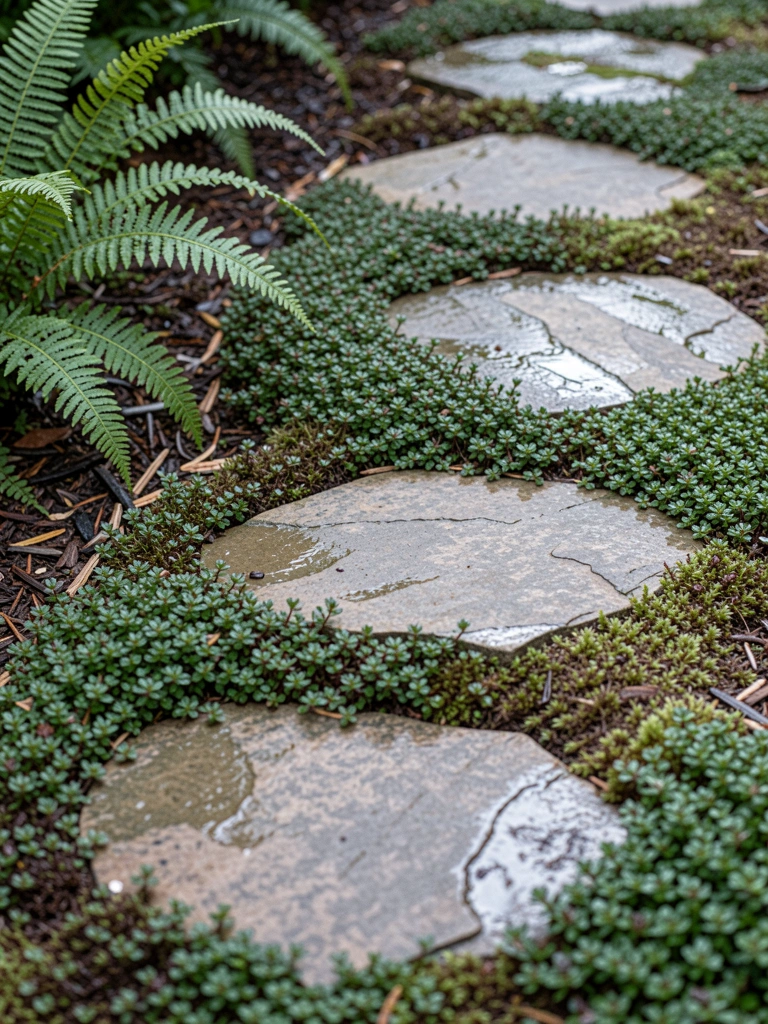
I started with big flagstones and they felt clumsy. I swapped to smaller, irregular pavers and planted thyme between them. The stones sit low, so mowing and weeding is easy. I once set stones too high and tripped—lesson learned: keep them flush with the soil. The scent of thyme underfoot is a small reward on warm evenings. Keep spacing close enough to step naturally and top with fine sand so they settle evenly.
What You’ll Need for This Look
- Irregular stepping stones (12–18 inch)
- Creeping thyme or moss plugs
- Fine sand for setting
- Garden trowel
3. Reclaimed Pallet Wood Walkway
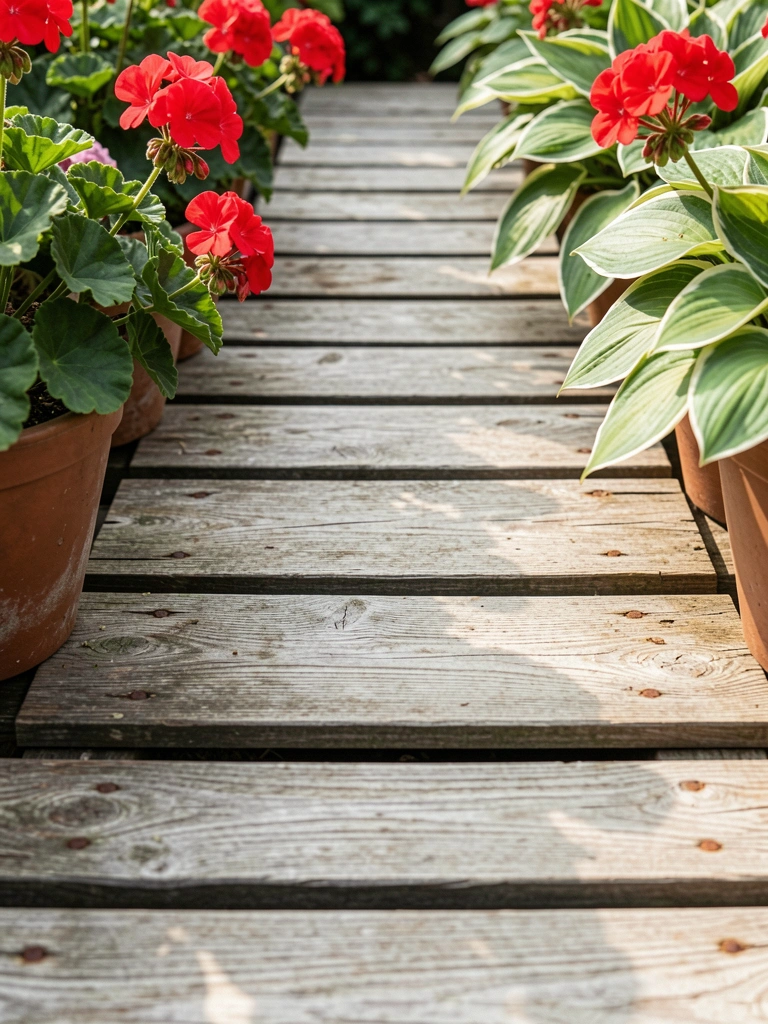
I salvaged pallet boards and cut them into short planks for a shady path. The wood warms up the space and was nearly free. The first winter some boards warped; I now choose thicker, kiln-dried pieces and seal the ends. I wedge the planks on gravel and leave small gaps for drainage. This feels cozy next to a shed or along a vegetable patch. Reclaimed wood isn’t forever, but it’s inexpensive and repairable.
What You’ll Need for This Look
- Pallet boards (36–48 inch), planed if possible
- Exterior wood screws
- Gravel base (3/8 inch)
- Waterproof wood sealer
4. Mulch Path with Stepping Logs
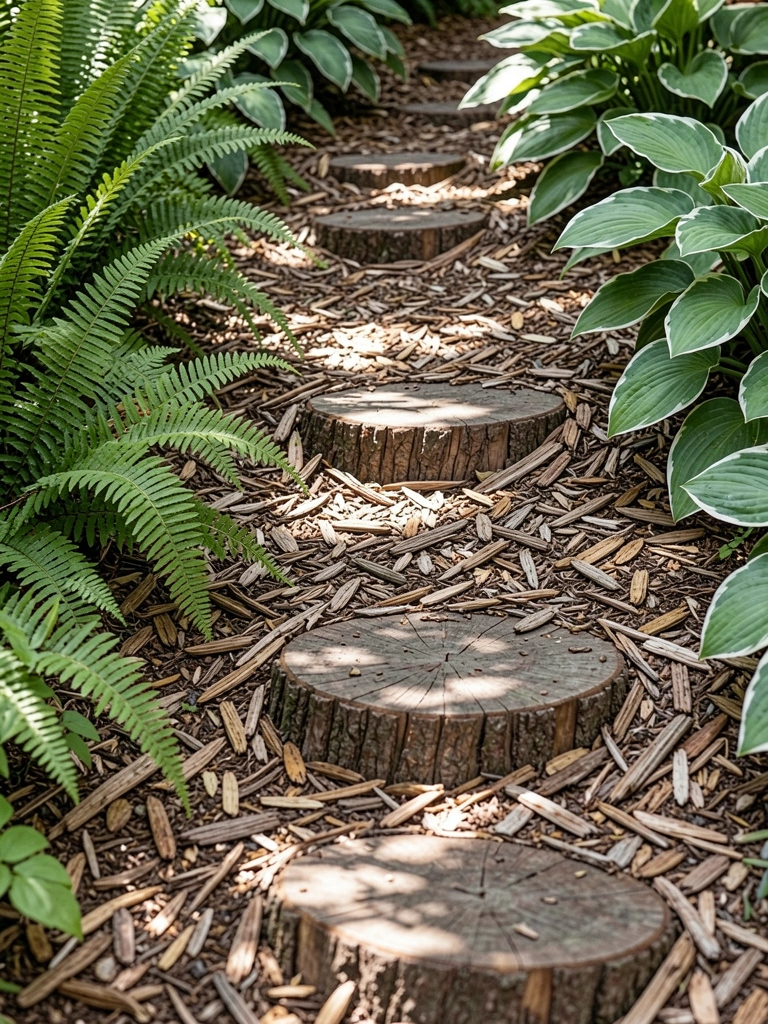
I used bark mulch to make a soft, cheap path through a shady bed. Half-logs placed as stepping accents keep feet off the slippery bits when wet. Initially I used fine mulch and it compacted fast; switching to larger wood chips improved drainage. It looks informal and suits woodland-style corners. Refreshing the mulch yearly keeps it tidy. This is perfect when you want a forgiving surface without hard materials.
What You’ll Need for This Look
- Wood-chip mulch (large flake)
- Half-logs or log discs (6–12 inch)
- Rake
- Wheelbarrow
5. Crushed Shell Path with Low-Profile Solar Lights (I underestimated how sharp shells can be)
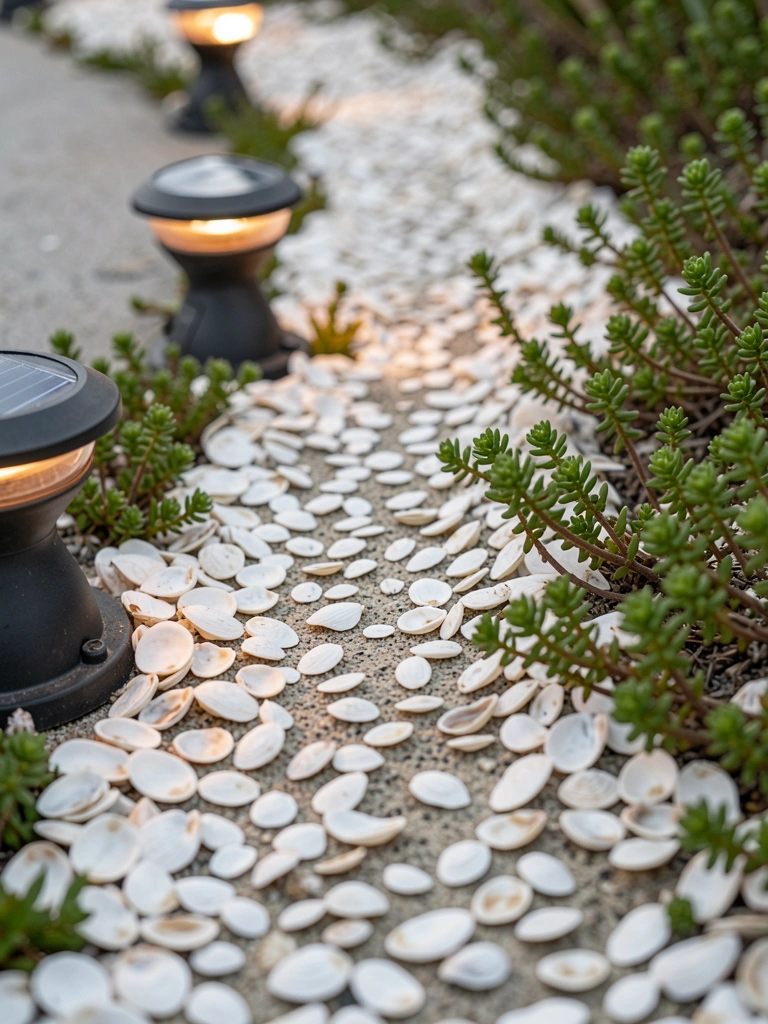
I laid crushed shells on a coastal plot and loved the light color. I learned shells can be sharp—smoothing with a compacting roller fixed that. I added low-profile solar lights that pop at dusk and cost little to run. The shells compact into a firm surface that dries quickly after rain. This look is great for brightening a border near lavender or sedum. Top with a fine beach sand if the surface feels uneven underfoot.
What You’ll Need for This Look
- Crushed shells, 40 lb bags
- Solar pathway lights, low-profile
- Compactor or hand roller
- Fine beach sand (optional)
6. Concrete Pavers Laid on Sand (no mortar)
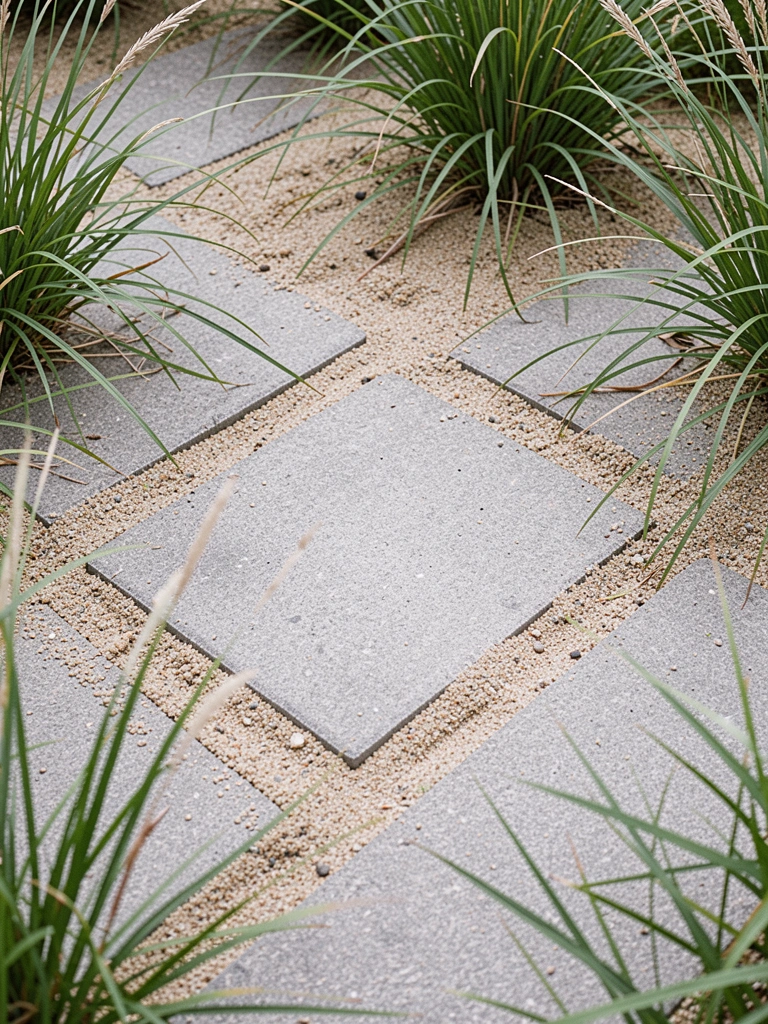
I used standard concrete pavers laid on sand for a reliable, budget path. No mortar made installation fast and repair easy. I staggered the joints to avoid long lines and planted blue fescue at the edges for soft contrast. The only maintenance is sweeping sand back into gaps and topping up after heavy rain. It feels clean and modern without high cost. If you expect heavy loads, compact a gravel base first.
What You’ll Need for This Look
- Concrete pavers (16 x 16 inch or similar)
- Sharp sand for bedding
- Gravel base (for high-traffic areas)
- Broom for jointing sand
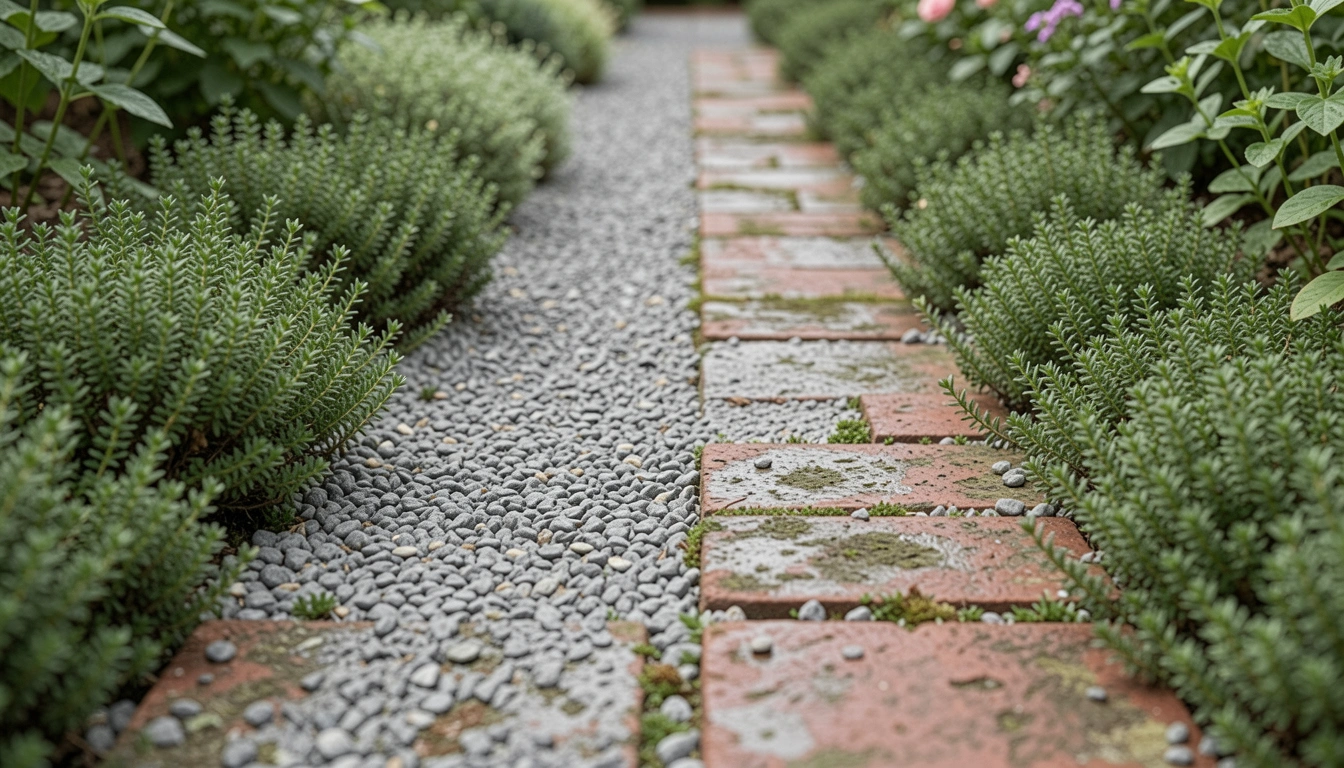
7. Recycled Brick Mosaic (I mislaid the pattern once and kept it—now I like the irregularity)
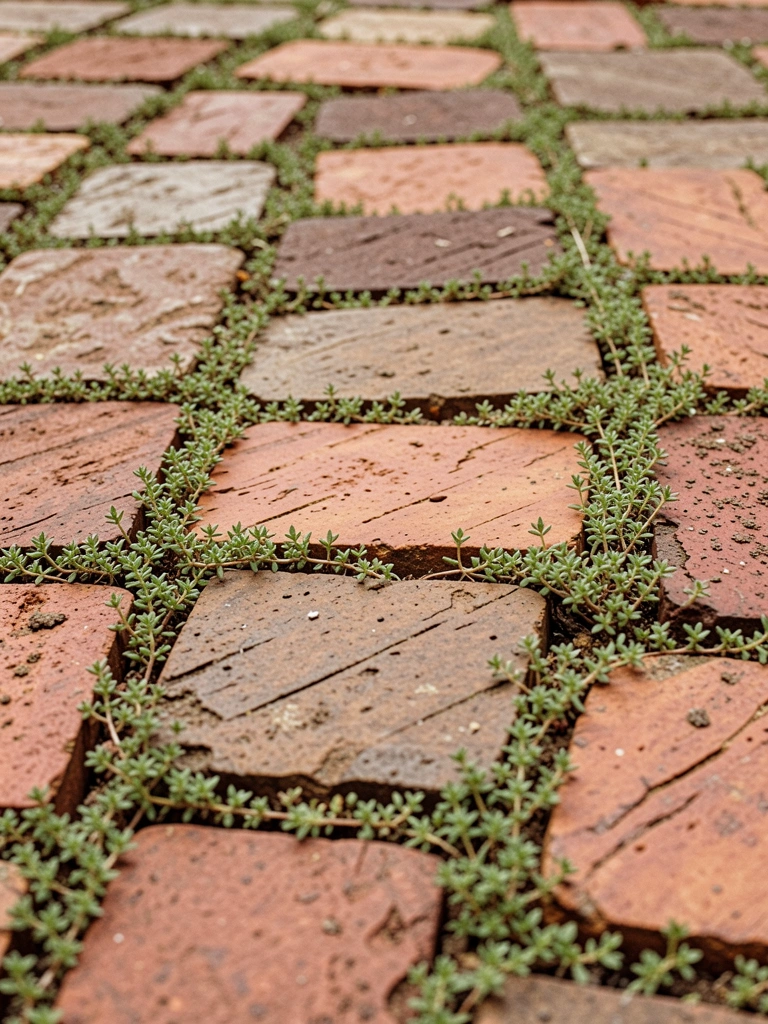
I pieced together leftover bricks into a small mosaic and botched the pattern halfway through. I left the irregularity and it became a feature. Bricks are forgiving: you can lift, re-set, and tuck moss into the seams. The surface is firm and warms in the sun—great beside seating. For best results, set bricks on compacted sand and level as you go. The era-worn look suits cottage and vegetable gardens.
What You’ll Need for This Look
- Reclaimed bricks, assorted sizes
- Sharp sand for bedding
- Rubber mallet and level
- Wire brush for cleaning joints
8. Stepping-Board Bridge Over Gravel (adds height without cost)
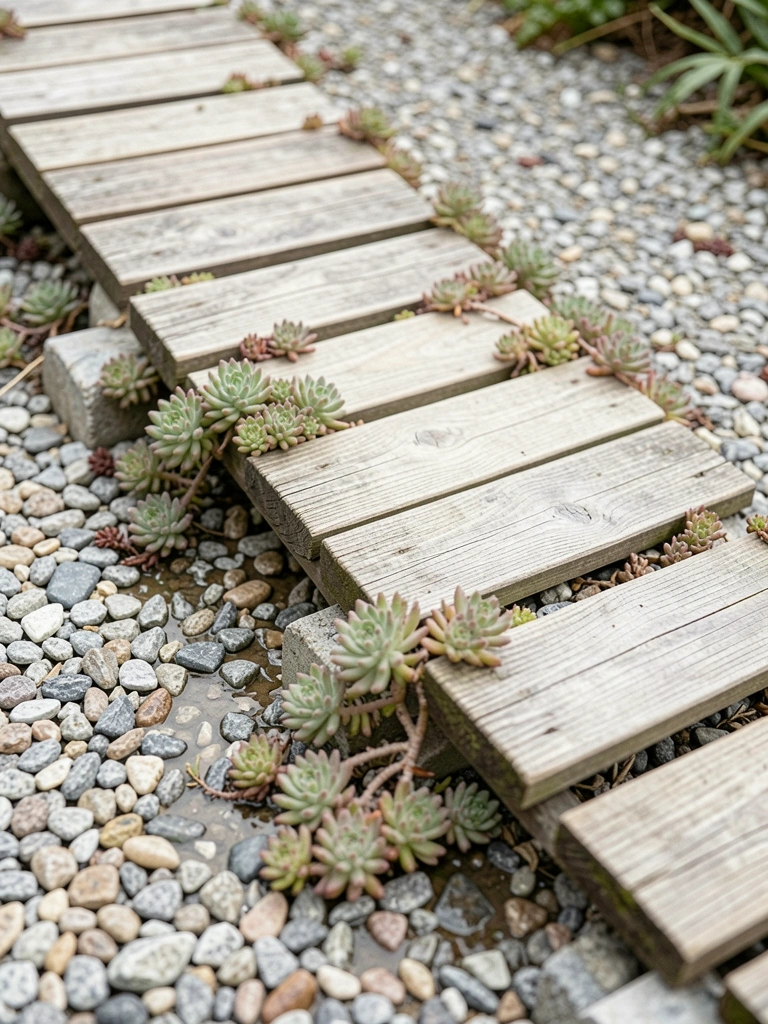
I needed a narrow crossing over a drainage swale and used two wide boards as a little bridge. It cost almost nothing and gave a sense of height. I anchored the boards on stones so they don’t move and sealed the top for durability. It’s important to check for rot each season. This creates a purposeful line through the garden and works well where a full hardscape feels too heavy.
What You’ll Need for This Look
- Wide reclaimed boards (24–36 inch)
- Flat stepping stones or pavers for footings
- Exterior wood sealer
- Screws or metal brackets (optional)
9. Grass Pavers (lawn with stepping edges)
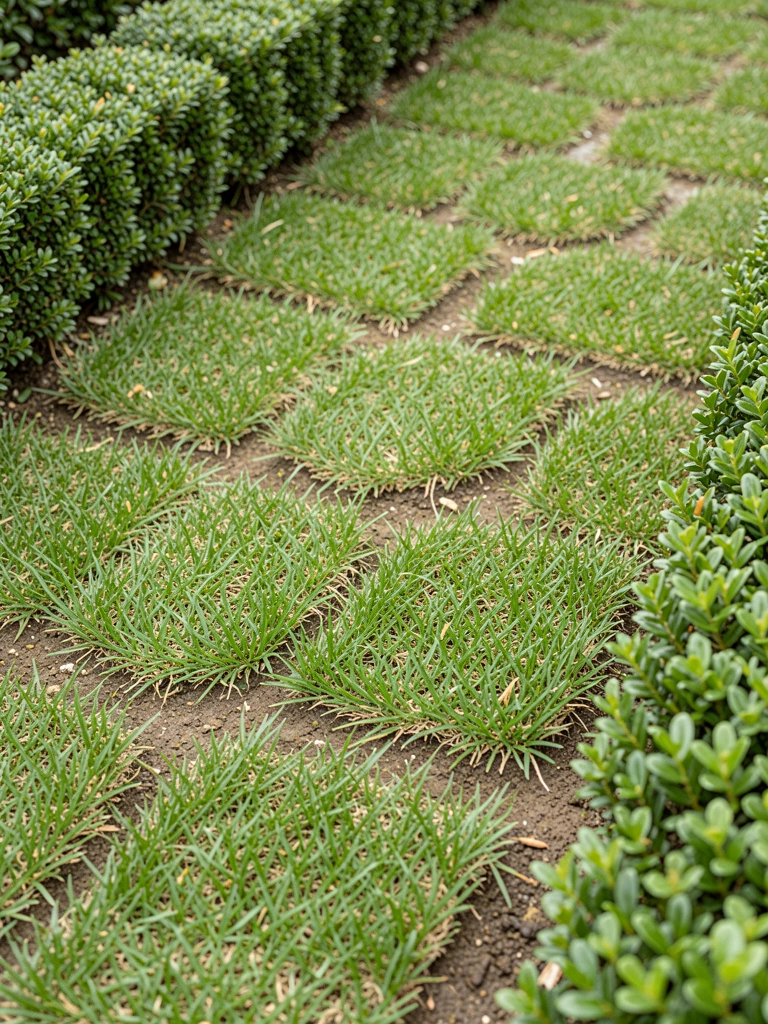
I cut straight lines in the lawn and inset concrete pavers so grass grows between them. It keeps things green and pleasant underfoot. Early on I used pavers too far apart and had awkward strides; spacing matters. I now place them at natural stride width and mow carefully. This look is quiet and cheap when you already have turf. It feels like a lived garden path, not a driveway.
What You’ll Need for This Look
- Concrete lawn pavers (12–16 inch)
- Flat spade for cutting turf
- Garden level
- Edge trimmer
10. Broken Tile Mosaic Border (I learned to seal tiles for frost)
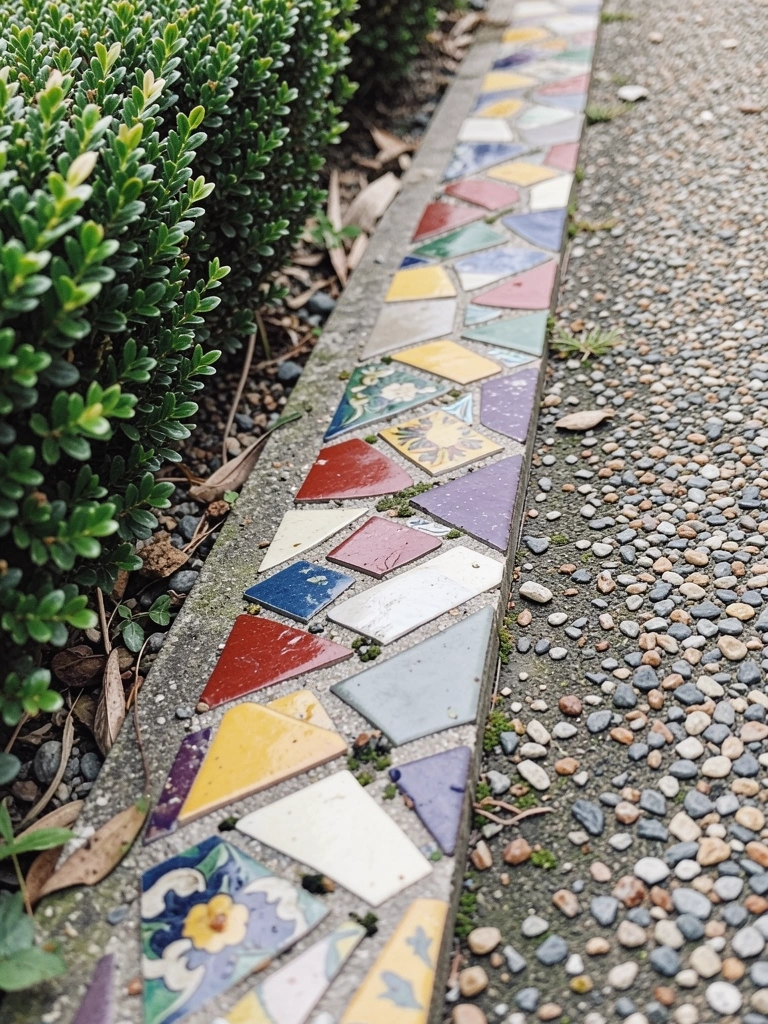
I used broken ceramic tiles as a border along a gravel path. It brightened the edge and used scraps I had saved. The first winter a few tiles cracked from frost; sealing them and using epoxy grout resolved that. The border feels custom without big expense. Keep the tile height low so mowers don’t catch them. This adds personality to paths close to patios or potting areas.
What You’ll Need for This Look
- Broken ceramic tiles (varied)
- Epoxy grout or outdoor mortar
- Small trowel
- Tile sealer
11. Sheet Mulch Stepping Zone with Native Plant Insets
I cleared a weedy strip and layered cardboard, compost, and wood chips to make a soft path. I cut openings to plant native grasses and small wildflowers—those insets made the path feel intentional. At first I underestimated weed regrowth; thicker cardboard and extra chips solved it. Over time the insets settled in and attract bees. This method is cheap, ecological, and flexible if you want to change the route later.
What You’ll Need for This Look
- Biodegradable cardboard sheets
- Compost and wood-chip mulch
- Small stepping stones
- Native plant plugs (grass and wildflower)
Final Thoughts
You don’t need to do all of these. Pick one that fits your yard, budget, and energy.
Start small, expect to tweak, and enjoy the way a simple path makes the garden easier to live in.