11 Budget-Friendly Cheap Garden Privacy Ideas
I kept losing a quiet corner to curious neighbors.
So I started patching privacy with cheap, do-able fixes from pots, trellises and scraps.
Most worked. Some failed.
Here are 11 cheap garden privacy ideas I actually used, messes and all. I’ll tell what I bought, what I built, and what I’d skip next time.
11 Budget-Friendly Cheap Garden Privacy Ideas
These 11 ideas are cheap, realistic, and tested in real gardens. I show practical layouts, easy materials, and what gave the best privacy quickly.
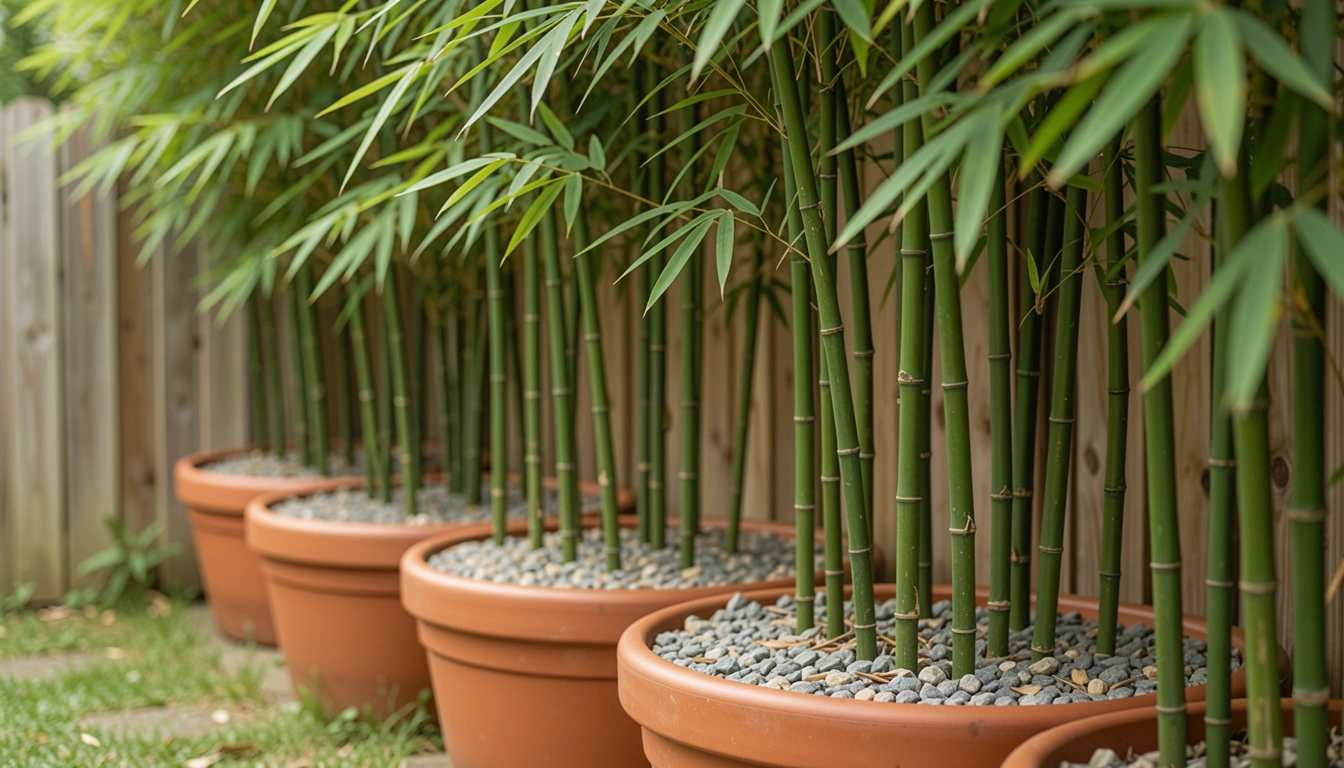
1. Potted Clumping Bamboo Screen
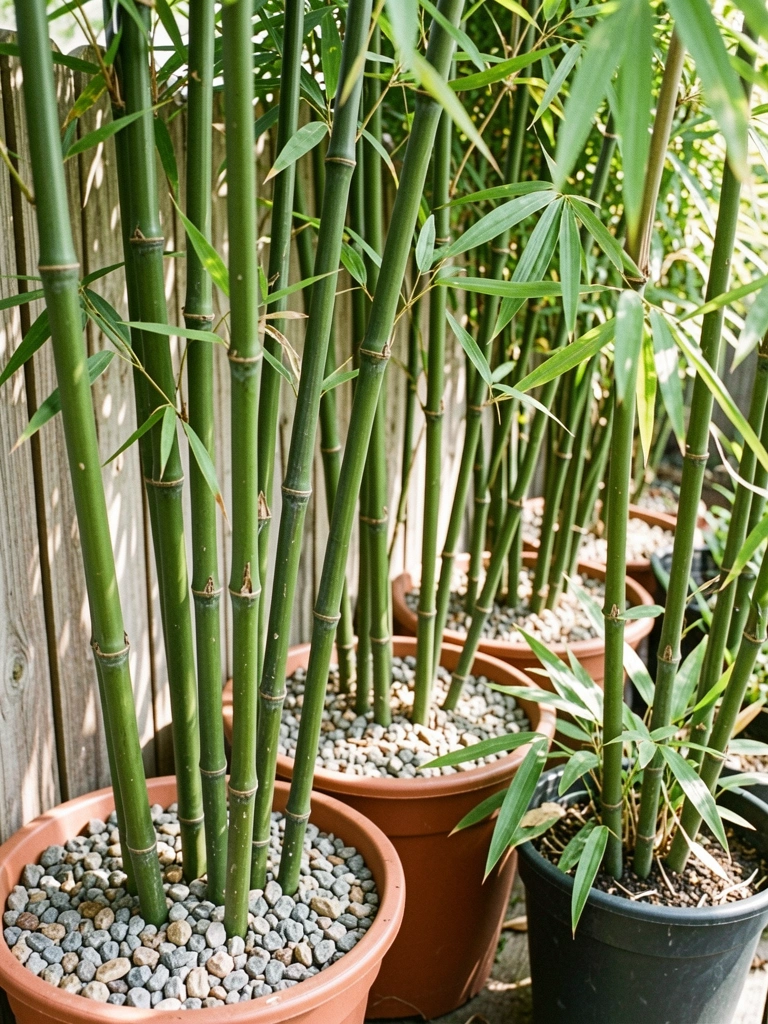
I planted fast-growing bamboo in gravel-filled pots along my fence to block sightlines without building anything heavy. It felt immediate; the first summer I had a real screen. I misjudged spacing at first and crowded the pots, so stems struggled for light. I thinned them the next spring and they recovered quickly.
Bamboo moves and shoots; expect maintenance. It sounds wild, but pots control spread and look clean. Place them where evening sun hits; they fill out thicker there and water regularly.
What You’ll Need for This Look
- Clumping bamboo in 10–15 gallon pots
- Large plastic or terracotta pots
- Gravel for drainage
- Coconut coir potting mix
2. Tension Wire Trellis with Climbing Runner Beans
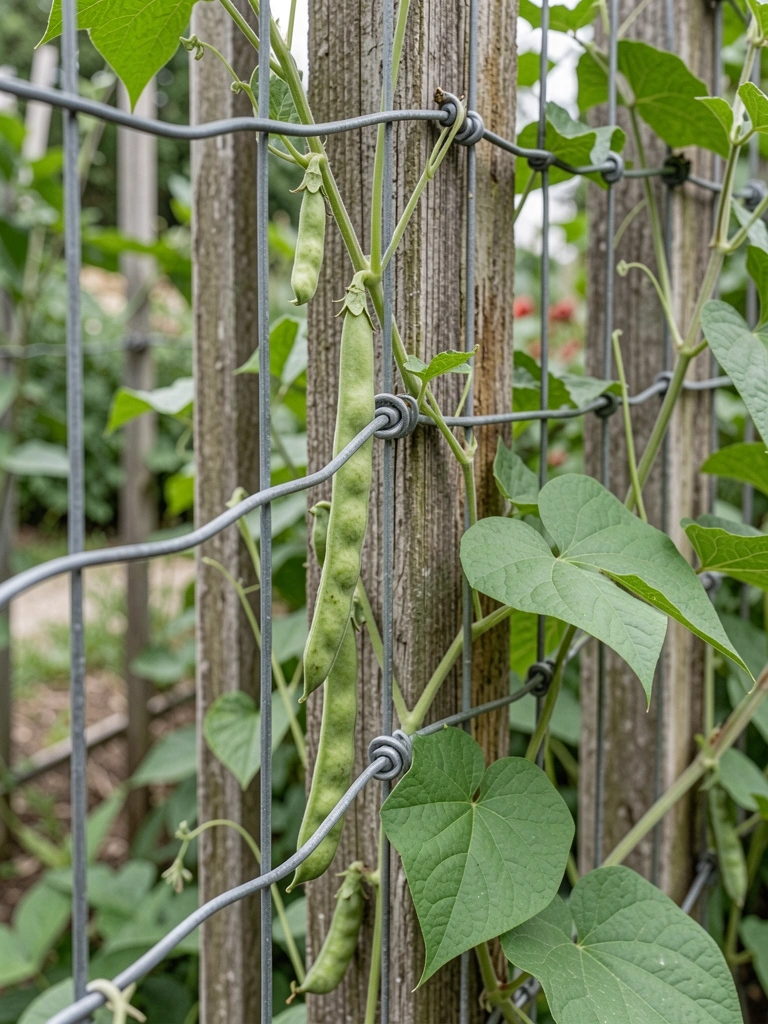
I strung two tension wires between posts and trained runner beans up them for a quick green wall. By mid-summer the beans hid the view and gave me fresh beans most days. I learned the hard way that thin wire sags under wet vines; I re-tensioned and added spirals to guide growth.
The screen felt light and breezy. Neighbors liked it because it smelled of flowers. Fix sagging and add a guide to keep vines climbing.
What You’ll Need for This Look
- Galvanized tension wire kit, 3–4 mm
- Weatherproof fence posts, 6–8 ft
- Starter packs of runner beans or sweet peas
- Plant ties or spiral supports
3. Recycled Pallet Planter Wall with Annuals
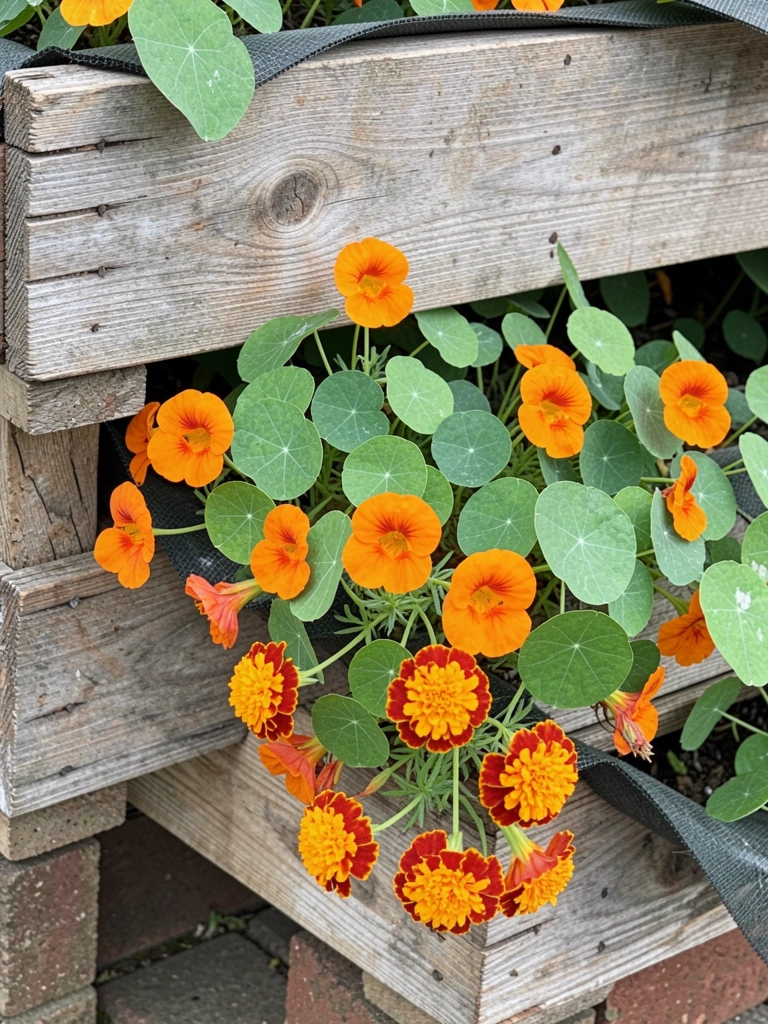
I nailed together old pallets and turned them into staggered planters filled with nasturtiums and marigolds. It felt rough at first, but color and scent softened the wood. I had rot on the bottom pallet in year two because I placed it directly on earth; now I raise pallets on bricks.
The structure gives vertical color and blocks the eye-level view. It’s cheap and cheerful. Seal the pallet undersides with decking stain to slow rot seasonally.
What You’ll Need for This Look
- Wooden pallets, cleaned and sanded
- Landscape fabric and screws
- Potting soil
- Annual seed packets (nasturtiums, marigolds)
4. Lightweight Lattice Panels with Clematis
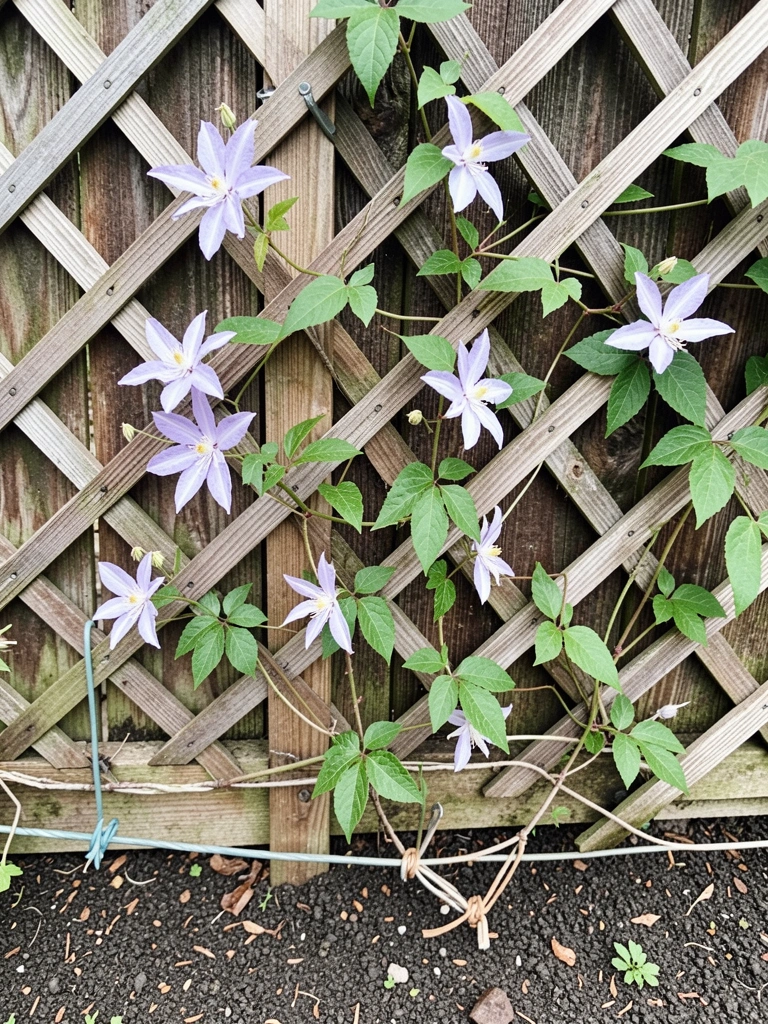
I attached lightweight lattice panels to the fence and planted clematis at the base. The first year the vines were sparse and I complained, then they exploded in year two and softened the fence completely. My mistake was underestimating root competition; I replaced gravel with richer soil and they thrived.
It feels like a living screen that still lets light through. I tie new shoots to the lattice as they arrive. Paint panels light color to reflect light and encourage more blooms.
What You’ll Need for This Look
- 3×6 ft lattice panels, wood or PVC
- Clematis starter plants, mixed colors
- Enriched planting mix
- Soft plant ties
5. Ornamental Grass Troughs for a Soft Barrier
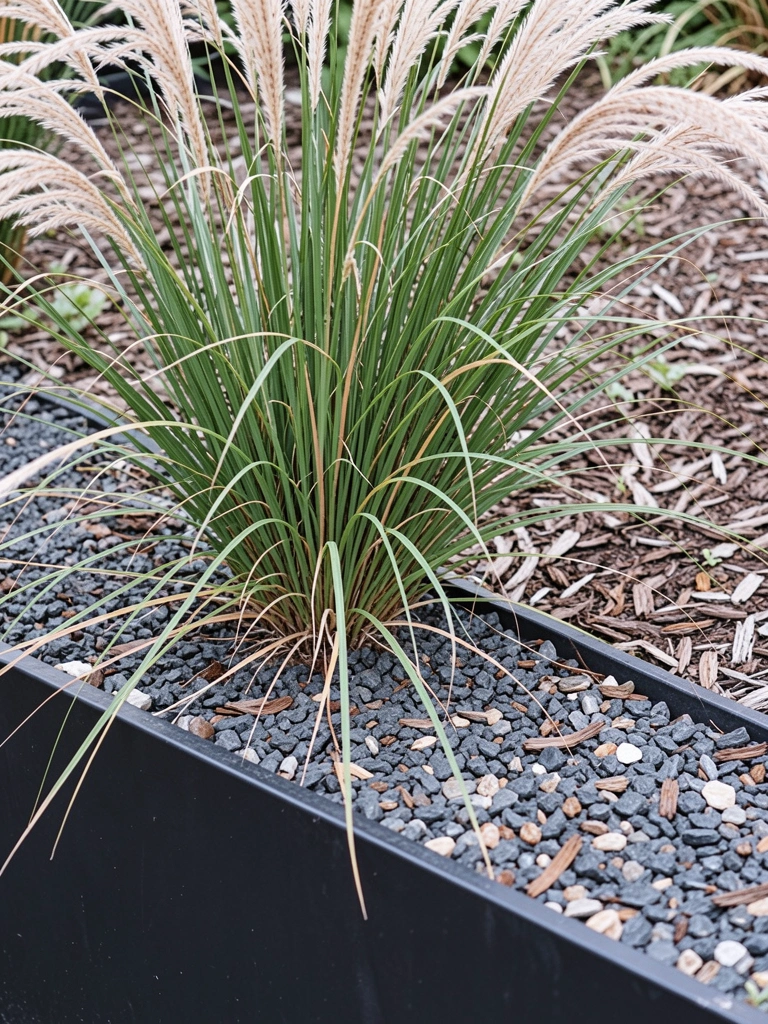
I planted miscanthus and pampas in a row of long gravel-filled troughs to make a soft screen. The grasses sway and muffle street noise more than I expected. I did overplant one trough and had to split clumps after two seasons.
It reads like a green hedge without the trimming work. In winter the stems hold shape and look made, so the garden still feels intentional. Place troughs on a rise and water deeply in the first season to root clumps.
What You’ll Need for This Look
- Long rectangular troughs, black or rust finish
- Ornamental grass plugs (miscanthus, pennisetum)
- Coarse gravel and sharp sand
- Slow-release fertilizer
6. Espaliered Fruit Trees Against a Wall
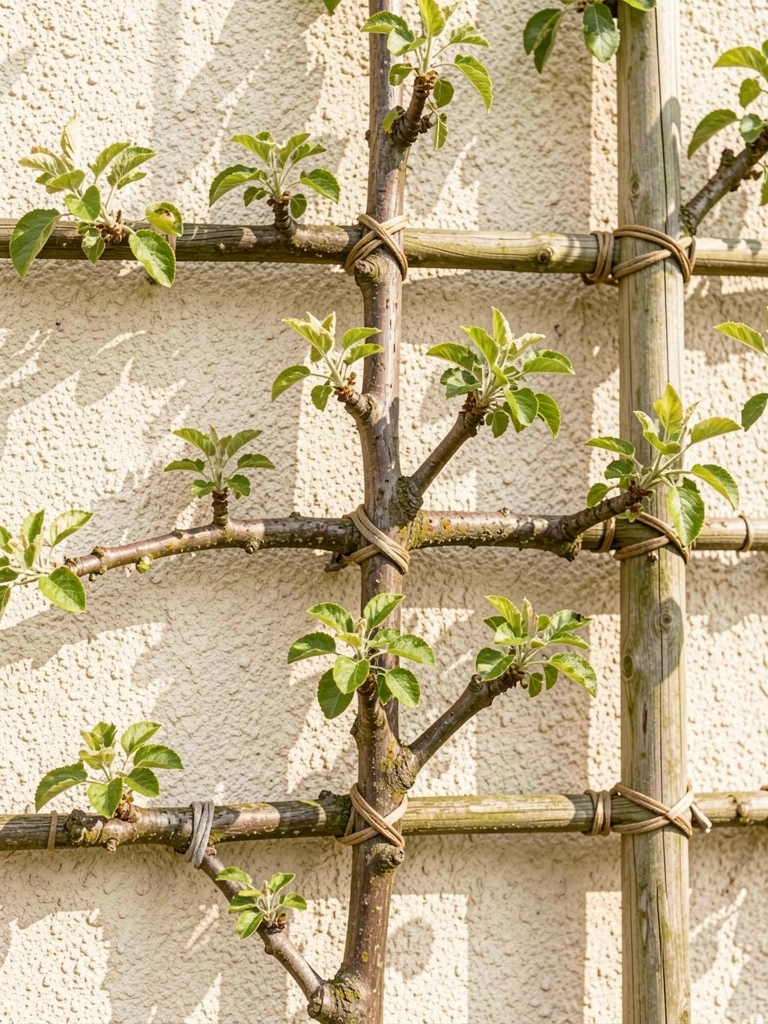
I trained apple and pear saplings flat against a sunny wall as a thin screen. It took patience; I pruned each winter and worried I’d butcher them the first year. They rewarded me with fruit and a tidy vertical barrier.
It’s more formal than my usual chaos, but the simplicity is calming. Birds visit and fruit brightens summer privacy with a useable reward. Start young and keep training yearly; small effort prevents a wild, heavy frame later.
What You’ll Need for This Look
- Espalier fruit tree saplings (apple, pear)
- Wall ties and soft twine
- Pruning shears and a pruning plan
- Mulch and compost to feed roots
7. Roll-Up Bamboo Blinds on a Pergola
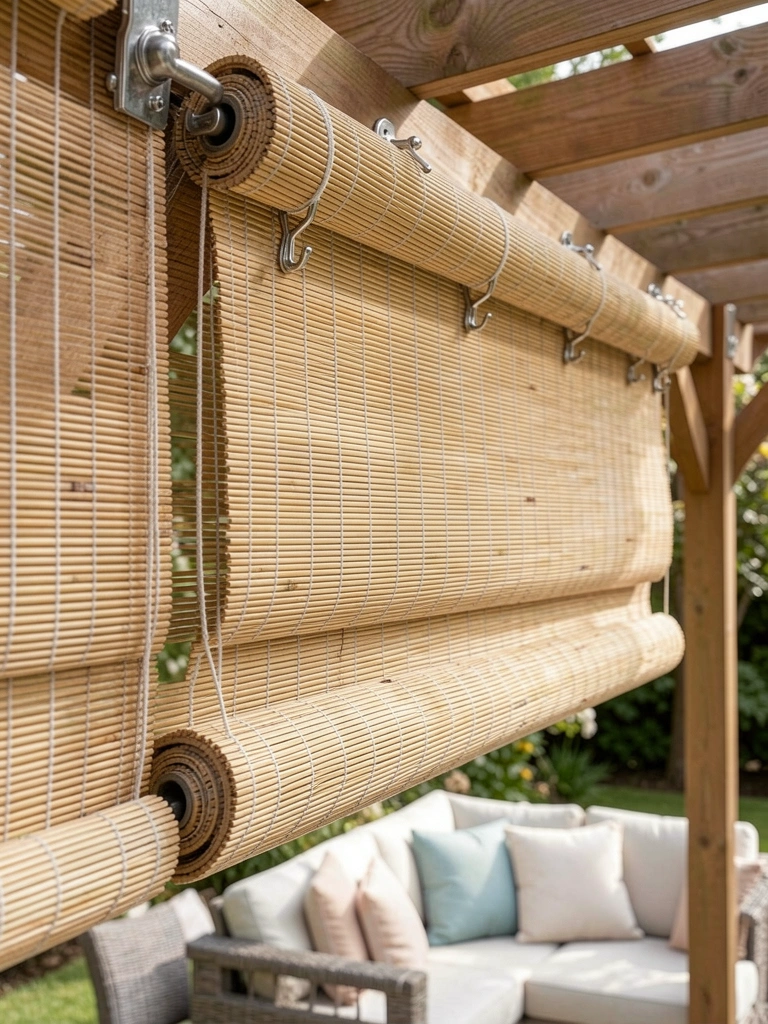
I hung roll-up bamboo blinds from the pergola to block neighbor views without closing in the patio. They look instant and fold up on windy days. I bought too-thin blinds once and they frayed; the heavier weave lasted through seasons.
The blinds add a warm texture and cut glare. I clip them down for privacy at night and roll them by day. Measure twice; heavier blinds need stronger mounts and an extra support point to avoid sag in storms.
What You’ll Need for This Look
- Roll-up bamboo blinds, heavy weave, outdoor-rated
- Stainless hooks and quick-release clips
- Short brass chain for weight
- Outdoor drill bits and screws
8. Willow Wattle Fence for a Natural Screen
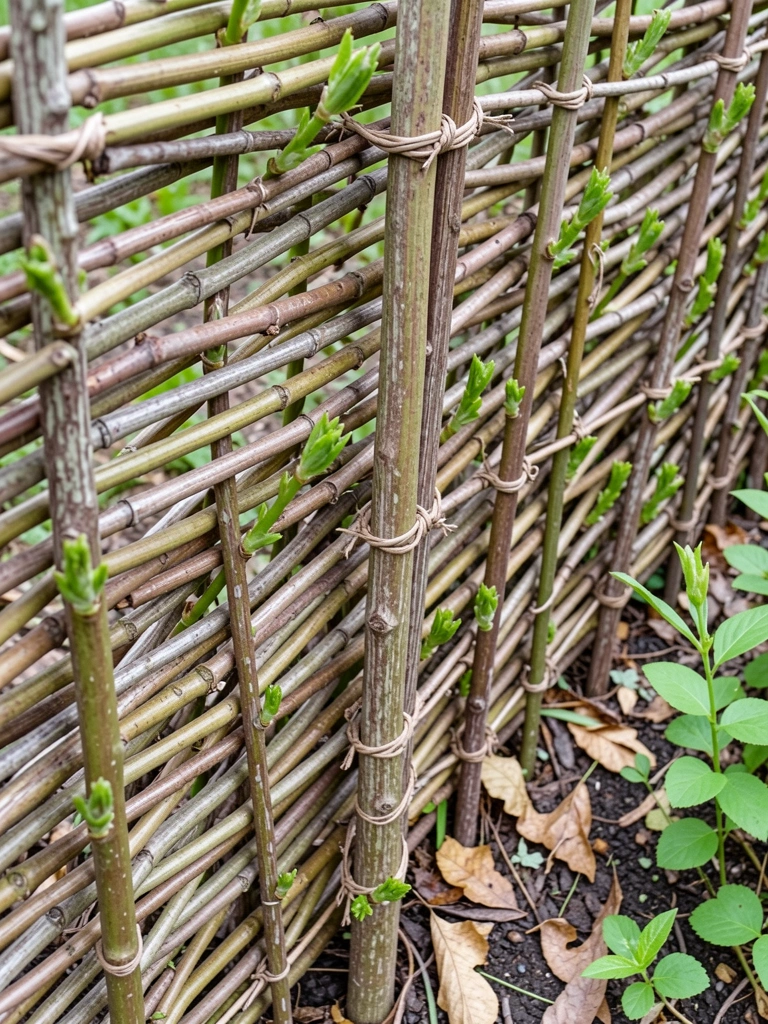
I wove willow rods into a short wattle fence to screen a play area. It felt hand-built and held up surprisingly well. I used thin, dry rods first and they snapped; using fresher supple willow fixed that lesson.
The fence looks natural and blends with planting. It’s flexible, easy to repair, and cheap if you cut the rods yourself. Place the fence on firm ground and soak rods overnight before weaving for flexibility. Rebind seasonally. Use willow cut after winter locally.
What You’ll Need for This Look
- Willow rods (fresh, 6–10 ft)
- Strong stakes (hazel or chestnut)
- Pruning snips and loppers
- Natural twine for extra binding
9. Stacked Half-Barrel Herb Wall
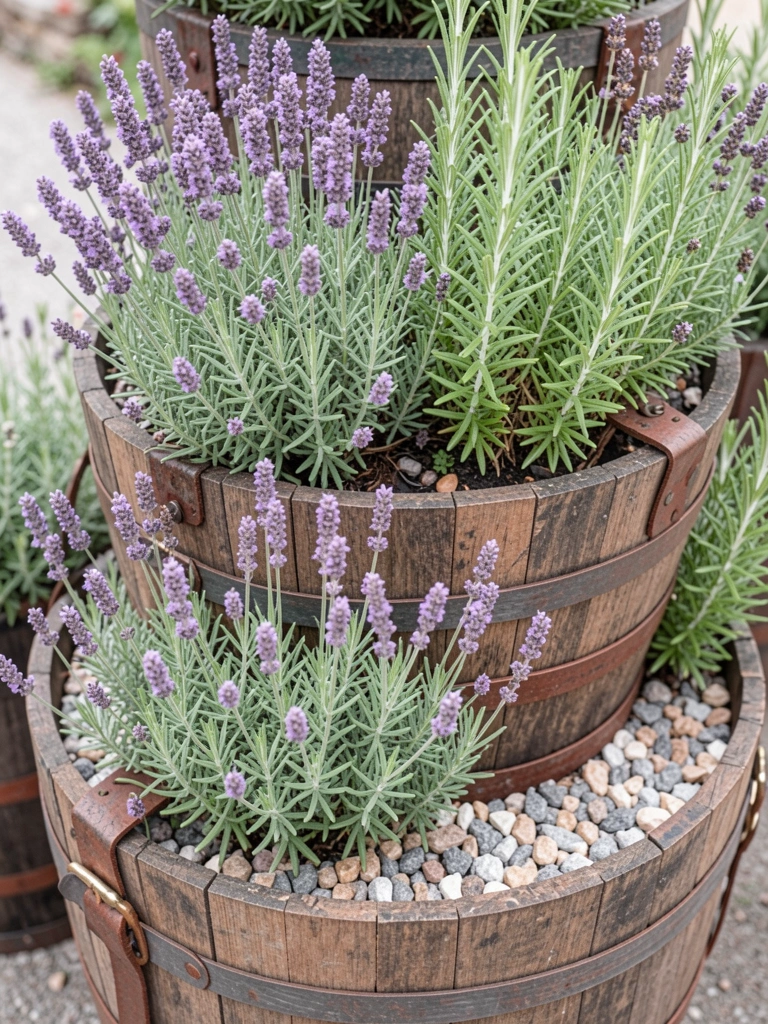
I stacked half-barrels to make staggered planting pockets and created an instant privacy layer. I planted lavender, rosemary and thyme so the scent joins the shield. My mistake was not anchoring the lower barrels; a storm shifted one and I added straps.
The wall looks permanent but I can move sections if needed. The herbs cope in poor soil and smell lovely when brushed. Place drainage gravel under each barrel and stagger heights for a layered screen that hides gaps. Mulch seasonally.
What You’ll Need for This Look
- Half-barrel planters, cedar or plastic
- Stainless straps and anchors
- Mediterranean herb starts (lavender, rosemary, thyme)
- Coarse potting mix
10. Evergreen Laurels or Boxwood in Budget Pots
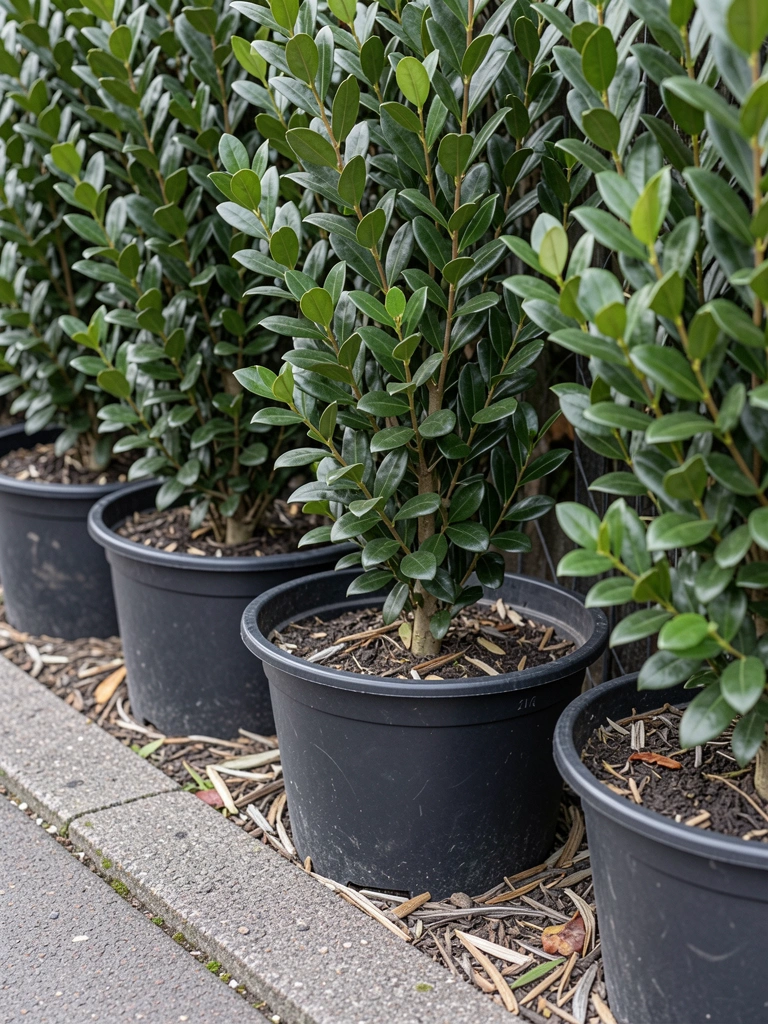
I planted small laurels in budget nursery pots and lined them up as a quick year-round screen. They were cheap and dense within two seasons. I made a mistake by picking too-small pots at first; upgrading to 20L pots let roots expand and growth sped up.
They look clean and evergreen through winter. I rotate a couple pots when they outgrow the line. Position pots with slightly different heights and stagger spacing for depth. Water deeply in dry spells and feed in spring.
What You’ll Need for This Look
- Evergreen laurel or boxwood 3-5 gallon starts
- 20L plastic nursery pots
- Moisture-retentive potting mix
- Slow-release shrub fertilizer
11. Shade Sail Plus Draped Outdoor Curtains
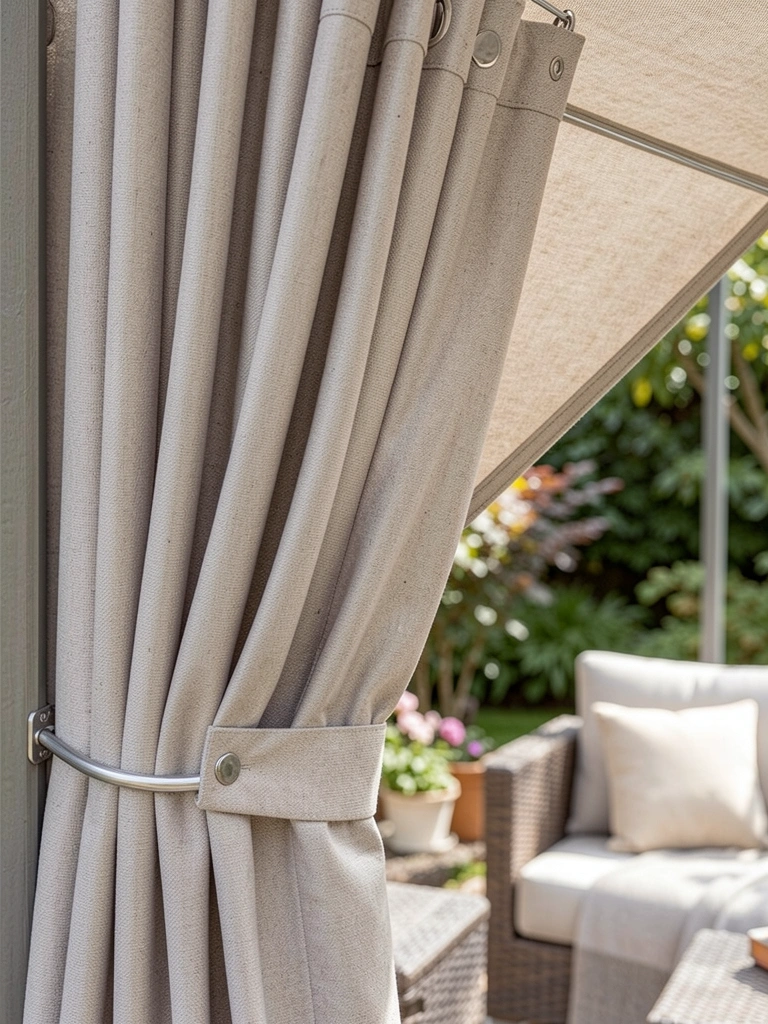
I fixed a triangular shade sail over the seating area and added outdoor curtains along the exposed side. The sail cut prying angles and the curtains make evenings private. I once bought indoor curtains and they faded; I now use outdoor-rated fabric that stays colorfast.
The combo feels like a room outdoors without building anything permanent. I push the curtains to one side when friends arrive. Anchor sails to posts and retension after storms. Pick a warm neutral color regularly.
What You’ll Need for This Look
- Triangular shade sail, UV-resistant
- Outdoor curtains, weatherproof fabric
- Stainless steel turnbuckles and eye bolts
- Rope or curtain rings for tracks
Final Thoughts
I didn’t try everything at once. I picked one or two ideas and lived with them for a season.
Start small. Learn the few habits each choice needs. Over time the privacy builds without big bills, and the garden starts to feel like your room.